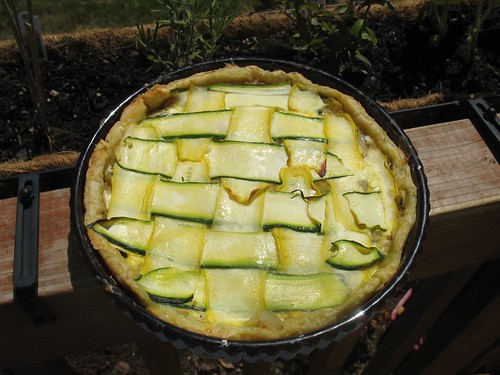
summer squash & zucchini lattice tart

28 August 2009

This beautiful savory tart was adapted from a Martha Stewart recipe. I made this for a Fourth of July BBQ and have been meaning to write up the recipe for awhile now. This is not really a particularly complicated tart to make. It really looks much more labor intensive than it is. The squash and zucchini for this particular tart were courtesy of Heather Q's garden.

IMG_8454

Here is what you need:
1 sheet of puff pastry (or pie dough would also work!) - thawed
2 medium zucchini
2 medium yellow squash
1 medium onion
1 large egg
1/4 cup of cream
1/2 cup goat cheese
1/2 cup feta cheese

Start by laying out your pastry crust on a tart pan and pressing up the sides. If you don't have a tart pan, you can also use a pie pan and only fill to about half way if you're using a pie pan. Poke a few holes in the bottom to help it ventilate and stay flat in the pan. Prebake the crust in a 375 degree oven for 7-10 minutes.
Remove the crust from the oven and allow it to cool a bit.

Meanwhile, use a vegetable peeler to collect a few long thin strips of the zucchini and the squash...you want enough of each to be able to lay flat across the top of the tart pan. Once you have your strips, pat them off between two paper towels and put aside. Chop the remaining squash and zucchini as well as the onion. Saut矇 the chopped veggies (not the strips) in oil and salt and pepper to taste for about 5-7 minutes until softened. Take the vegetables off the heat and mix the goat cheese and feta in until everything is well blended. Transfer this mixture to the crust. Whisk the egg into the cream and pour over the vegetable mixture.

Now, you can either make an open face tart and just throw it in the oven now if you don't want to fuss with the lattice top, but I think the beauty of the lattice top makes it completely worth the effort! To make the lattice, you will do it just like you would a pie (see this link for instructions) and squash has your horizontal stripes and the zucchini as your vertical stripes. Once you weave them, you will get this lovely effect. I obviously didn't have perfect shape and length on all the strips, but it's easy to overlap strips and just make it work. Brush the top with olive oil.

Loosely cover with aluminum foil and bake for 30-40 minutes. Allow to cool slightly before serving.

honey roasted plums!

27 August 2009

Yesterday was farmer's market day! Well, I guess every day is usually farmer's market day somewhere in Portland when it's summertime, but I love to stop at the market next to overlook park on my way home from work. This is just the perfect time of year for the market and there is so much in season. I bought some fresh eggplants, cucumber, zuchinni blossoms, plums, and some other wonderful bounty so I can cook up a storm in the next few days.

Last night, I made some amazing honey roasted plums that I cannot seem to get enough of...

IMG_9072

This addiction to the honey roasted plums started last summer when Summer made a post on her blog that rocked my world. A very simple way to make late summer plums into a masterpeice. I reworked her recipe a little to fit what I had in the cabinet and combined 6oz of honey + 2 tablespoons of butter + 1 tablespoon of lemon juice + 1 teaspoon of vanilla + 1/2 teaspoon of almond extract. The almond extract helps to work with the vanilla to make the plum flavor pop.

IMG_4747
I also made a really basic cream cheese topping

4 ounces of cream cheese (1/2 package)
1 cup whipping cream
3 tablespoons powdered sugar (or to taste)
1 teaspoon vanilla extract

Just combine all these things in a blender (or you can use a stick blender) for a few moments until the cream starts to froth and thicken. i make this topping all the time because it is so basic and so wonderful. It also makes perfect side for dipping fruit (like strawberries!) or adding to sweet crepes.

new tattoos = home made cat & dog treats!

25 August 2009

IMG_8975
Last week, I got a pair of new tattoos that I am really excited about. They are the paw prints of two of my favorite things in the world : my cat (Milo) and dog (Ellie). In honor of my new tattoos, I thought it might be time for a pet themed blog post!

My pets are my kids and as much as I love to bake special treats for my loved ones, sometimes it is also nice to bake some little treats for my furry loves. Also, most comerical pet foods and treats are made from sub-standard ingredients and a lot of chemical fillers and perservatives that are not exactly the best things for our pets to be eating, so it's nice to make something and know exactly what you are feeding your animals.

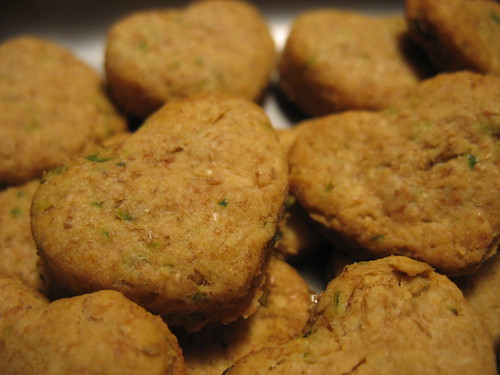
Peanut Butter and Parsley Dog Treats
IMG_9022
The addition of parsely in this is completely optional. I added it because I happened to have it on hand and parsely is a safe natural breath freshener and my dog has some STINK breath, so I figured it was worth throwing in there!

2 cups whole-wheat flour
1 tbsp baking powder
1 cup peanut butter
1 cup skim milk
1/2 cup chopped fresh parsley


Mix all your ingredients with a wooden spoon in a medium mixing bowl. Roll the dough out to about 1/4" thickness and cut the treats out to a size that fits your dog. I used a tiny little heart cookie cutter because I have a 7 pound min pin with a tiny mouth, but you can use a bigger cookie cutter or just cut a few rectangles out for a more no fuss approach. Bake at 350 degrees for 10 minutes until brown.


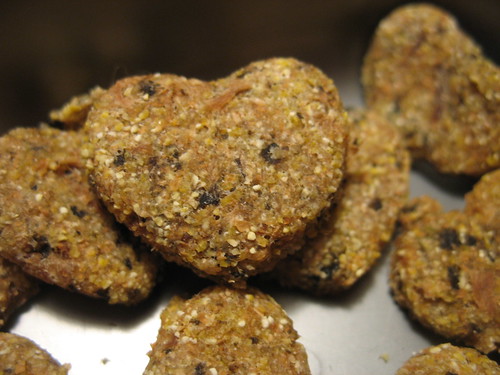
Tuna & Nori Cat Treats
IMG_9018
My cat's favorite thing in the entire world is nori (seaweed). I buy little boxes full of nori strips at the asian market and he goes comepletely insane for them, so I decided to attempt to make treats using nori. You can skip the nori part if you don't have it readily accessable.


6 ounce can of tuna - undrained
1/3 cup nori (dried seaweed)
1/4 cup cornmeal
1/2 cup whole wheat flour


Tear your nori up into tiny peices or pulse it in the blender for a moment. Combine all your ingredients in a medium bowl and mix with a spoon untill well blended. The dough for these is rather gooey, so I suggest using a silpad or spraying your pan with oil before you bake. You can roll these out and cut them up, or just grab little balls and flatten them as you might with people cookies. Bake at 350 degrees for 15 minutes until brown.


IMG_9052IMG_9030

Makeup Basics

24 August 2009

IMG_8461

For a long time, I had no interest in makeup. I felt like it was something people wore because of shame or to hide their flaws and feel shame, but I have recently made a new relationship with makeup and I want to share that with you. Makeup is about art and color and enhancing the things you love about yourself.

I do not think anyone should be made to feel like wearing makeup is the only thing that will ever make them "enough", but I do think if you want to wear makeup for yourself and no one else, then you should do it and not worry about the "right" and "wrong" ways to do it.

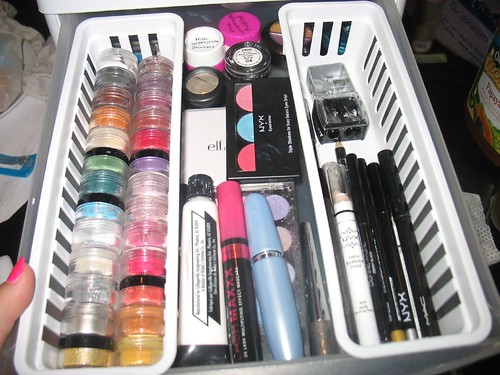
In the past year or so, I've done a lot or research to unlock the mystery of makeup application. I've read countless blogs, tutorials, and product reviews...and it is kind of complicated when you have so many different products on the market and you are trying to separate a good ad campaign from the product. My make up collection has become vast and honestly a little out of control and I have tried the dollar store brands and the high end pricey brands and I have learned a few things that I would like to share with you.

Decide what kind of things you want to achieve with makeup. Set some goals and decide what you like and don't like. If you don't like wearing mascara or putting it on, then don't buy it...sure, it's an "essential" to most people, but it is worthless if it doesn't make you feel good and you can always change your mind and try it out later. Don't let other people's rules about make up (including mine!) dictate your experience.

Here are a few of basic things I live by when it comes to make up:

+If you are going dramatic, try to pick either the eye or lip...doing both can be overwhelming. it's nice to do a subtle eye with a dramatic red or bright pink lip or a dramatic colored eye with a glossy simple lip.

+There are a few drugstore things that you don't have to spend a fortune on and then there are some items that are worth the extra money. I will try to go over a few of those things in upcoming posts. Always trust your gut, only buy what fits your budget that you think is really worth it, but also don't be afraid to splurge a little on yourself!

+A makeup collection takes time to build, don't get frustrated or break the bank all in one week. Pick a few things you want to learn about and collect those things over time. I personally decided to start with eyes...I wanted to master the eye make up first, so I collected a whole bunch of shadow colors to play with, then liners, mascaras...then I moved to learning about other things like new lip products and face products. It was a gradual process for me.

+Shop the sales! Drug store brands have a lot to offer and usually there are weekly specials like buy one get one free and that is a great time to try some things out.

+If you are not used to wearing makeup, bright colors might scare you at first and that is ok. The colors probably do not look bad on you, it can just be weird do see them on your face at first, so give yourself some time to get used them before you decide you hate them. And if you decide bright colors are not your thing, that is ok too...neutral colors can be used to make your face pop in different ways and really enhance the things you love about yourself.

+Makeup is not permanent. Take some time on a causal night in a fool around with it. It's easy to clean off.

+Get yourself the right tools. Brushes really are just as important as the products you are using...maybe even more important in a lot of cases. If you want to make some fancy eye shadow magic, it's just like a painting, you need some brushes that will make the look. They don't need to be fancy brushes, just get yourself a cheap set and learn about which brushes work best for which looks.

I am not sure if this is very interesting to any of you because it's not exactly the kind of thing I normally write about, but I would like to make a short series of posts in the next few weeks about make up tips, thrifty tricks, and general information. Is there anything in particular you are dying to know about?

I have not left you!!

07 August 2009

I did not forget about this blog, I promise. I've been thinking about it. It's just been such an overwhelming summer. Good overwhelming, but overwhelming nonetheless.

IMG_8672 IMG_8643

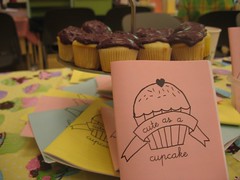
I spent a lot of time making a new zine! 2 actually. The zine is a lot like this blog, so I maybe that is why I have not had the energy to update this blog AND write a zine. The first zine is called "New Wave Domesticity" and it is full of of recipes, tips on pie making, craft projects, how to can, how to remove stains, and lots of other nerdy domestic-ness. The other zine was a collection of cupcake recipes and it is called "Cute as a Cupcake". The zines debuted at the Portland Zine Symposium which was lovely. I will have both of these up for sale online in the next few weeks, I just have a busy summer in store!

Other wonderful things in the past two months:

+Portland is amazing in summer. It's full of so many events and sunny day plans. I have a lot of photos and things I will slowly be uploading. Lots of wonderful food and crafts that I will be updating and sharing with you soon!

+I got a promotion! Starting in Septemeber, I will be the "Cultural Director" at my work. This basically means planning events for my lovely coworkers, maintaining the office, working on in office and customer facing campaigns, and lots of other things. It's kind of a dream job and I am so excited to start!

IMG_8357
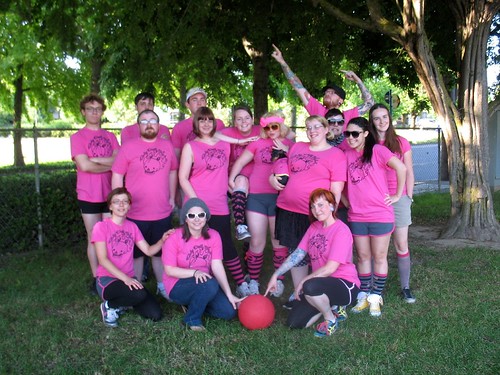
+Our kickball season just ended! It has been a total blast playing sports and drinking beer with my awesome friends and coworkers. I have often been really apprehensive about team sports (I haven't really played anything since

+I bought my tickets to Philadelphia for next month! I will be taking my best friend, Katy, home with me to visit my family and eat a ton of east coast foods that I have been missing like crazy! A much needed vacation in on the horizon.


+I have so many more updates coming soon! <3

sweet and savory grilling! grilled asparagus and peaches.

26 May 2009

it's officially summer in portand. i don't care that the sostice is not until late june. the sun is shining, i have sunburn, and everything feels like summer, so it's summer! i've been busy trying to take care of things around the house before i get to caught up in the summertime. this much needed 3-day memorial day was spent going to yard sales and cleaning house mostly, but we also made a lovely dinner on our tiny grill.

here are two super simple grill recipes we used yesterday and they both turned out wonderfully. if you do not have a grill, these would be great in the oven as well. you would just want to cook them at about 400 degrees and check in on them every few minutes since they are both fast cookers.


grilled asparagus
IMG_8066

1/2 bundle of asparagus
marinade:
1/4 cup olive oil
1/4 cup soy sauce
1 tablespoon black pepper
1 teaspoon rosemary
1/2 teaspoon liquid smoke (optional)


combine marinade ingredients in a jar and shake.
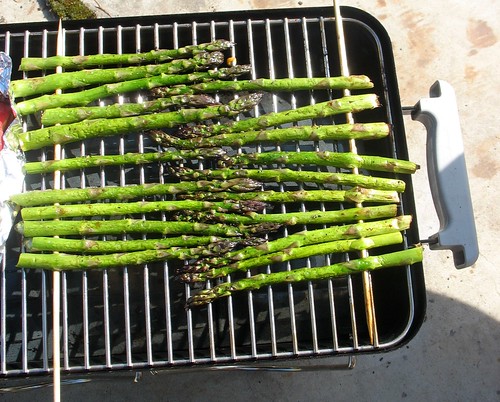
trim & wash your asparagus and the skewer through the thick part of the stem (you don't need to use a skewer, but it just makes it a lot easier to flip them and make sure they don't fall into the grill). i put about 10 spears per skewer and that seemed ideal.
lay asparagus skewers on aluminum foil (a little more than twice the length of the asparagus - about the length of a cookie sheet) pour half the marinade onto the first skewer. flip and make sure all the spears are coated. wrap the foil around the asparagus and refrigerate for about 30-60 minutes before grilling. grill each side for about 3-5 minutes until the asparagus gets tender.

and

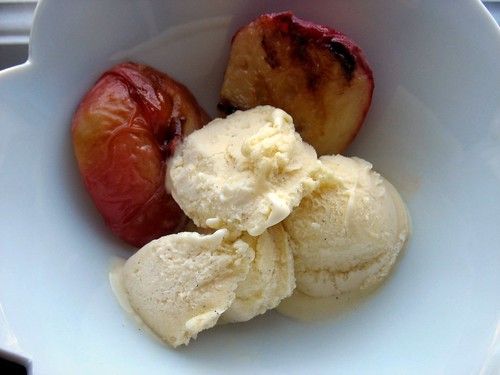
grilled vanilla peaches
IMG_8068

2-4 ripe peaches
1/2 cup brown sugar
1 teaspoon vanilla extract
1/4 teaspoon almond extract
1/4 teaspoon cinnamon
vanilla ice cream (optional)

wash and cut the peaches in half or quarters. remove the pits.
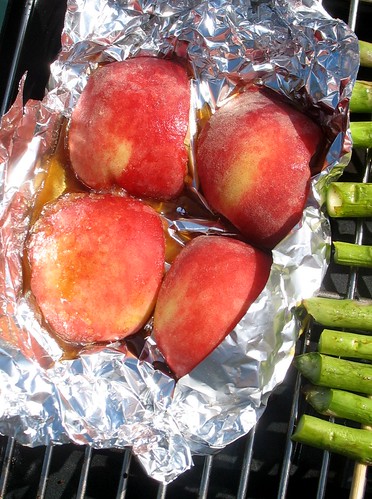
in a small bowl, mix sugar, cinnamon, almond extract, and vanilla. rub this mixture onto the peaches and coat on all sides. put the peaches on a piece of aluminum foil cut side down and curl up the sides a bit to avoid sugary syrup dripping all over your grill. put the foil and peaches on to the grill and allow to cook covered for about 3-4 minutes until the sugar melts and starts to caramelize. using tongs, remove the peaches from the foil and place directly on the grill for about 4-5 more minutes until desired tenderness. they turned out amazing! so easy, nothing too fancy involved, but they are just such a lovely treat for a cookout! you can eat these right off the grill, but i thought they were especially good with some ice cream on top!

IMG_8072

7 things

14 May 2009

i was tagged by the lovely jen at classic catastrophe, so here it goes!

the rules are simple. you're supposed to link to the person who tagged you and write 7 things about yourself...

01. i go through phases. for a few weeks, i will be really into home decorating, then a few weeks of zines, or a few weeks of crafts and sewing. i always love all these things, but i just get super fixated and stoked on certain things one or two at a time and then move on and move back to them eventually. this leads to a lot of unfinished projects sometimes.

02. i love my pets. a lot...in a kind of nerdy way. i am really not interested in the whole baby thing, so the dog and cat are my kids and i kind of treat them as such.

03. i have lived in 3 states: pennsylvania, new jersey, and oregon. i've been in portland for almost 6 years and i am completely in love with the city i live in. one of my biggest dreams is to be able to purchase a house here.

04. bryan and i have been dating for almost 3 years. it's my longest relationship to date and i'm still really smitten. we live together in a cute duplex in northeast portland with previously mentioned dog and cat that we treat like children.

05. i started a kickball team at work and i am pretty excited about it. we are called the "ruby death squad" and our season starts in late june. i'm mostly excited for matching outfits.

06. i have always dreamed of writing a book. i don't think now is the right time for me to actively work on that, but i hope to be a published author in my lifetime.

07. i cannot stand fashion ponchos. i think they were an awful, awful trend and i like to think of them as my fashion nemesis.

Then tag 7 people and let them know so they can write 7 things. 7 people I would love to learn more about:

01. Amanda @ Amanda Kenney
02. Jen @ Saving Cents in the City
03. Krissy @ Pony Boy Press
04. Anelnina @ Angelnina's Cottage
05. Bryan @ Draw Damn you
06. Nikey Robo @ Fashion Ration
07. Summer @ Design is Mine

roasted tomatillo salsa verde!

05 May 2009

IMG_7866

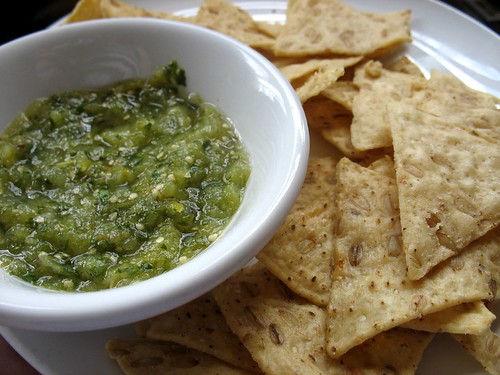
tomatillos are the cutest things ever. they are little tiny green tomatoes wrapped in leaves. i found mine at a winco supermarket, but if you have trouble finding them in the supermarket, you may want to try a mexican market if you have one in your area. i have always wanted to do something with tomitillos, but they are a bit intimidating to me for some reason, but a flickr contact gave me this recipe and i needed to try it. this was actually a super easy salsa to make and it is so good! it's a very mild salsa, but it's easy to pump up the spice with a hotter pepper. and i have a passionate love for cilantro, so anything with a mess of cilantro involved and i am totally sold.

roasted tomatillo salsa verde

1/2 pound tomatillos
1/2 cup chopped onion
1/2 cup cilantro leaves
1 tablespoon lime juice
1/4 tablespoon sugar
2 jalapeno or serrano peppers (i used one because i am a wuss, but adjust to the heat you'd like) - stemmed, seeded, and chopped

broiler to high. remove papery husks from tomatillos and rinse well. cut in half and place cut side down on a foil lined baking sheet. cut peppers and place on baking sheet as well. roast in the broiler for about 4-6 minutes untill skins start to blacken. once they are roasted, allow them to cool for a few moments and place all the ingredients in a food processor or blender and pulse until ingredients are chopped and nicely mixed up together. add salt to taste and cool in the fridge before serving.
makes about 3 cups

i plan on trying out a few more recipes for salsa verde to see if i can get a high enough acidity for safe canning and storage but still keep the fresh flavor. more on that soon.

veggie empanadas!

04 May 2009

a few weeks ago, my coworker brought these little gems in for a potluck and i knew i needed to make them again. there was never really an official "recipe" for this so i did my best to document it as i made it...

IMG_7838

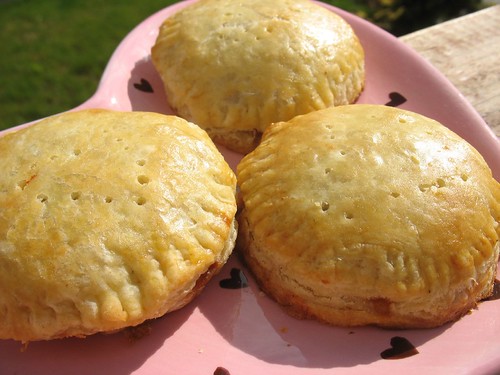
vegetarian empanadas!

1 package of puff pastry (available in the freezer section)
1 tablespoon vegetable oil
1/4 cup chopped onions
2 cloves minced garlic
1/2 cup chopped peppers (i used a combination of green, red, and a bit of serrano)
1/4 cup corn
1/4 cup cilantro
1 can black beans
1/4 cup of salsa or enchilada sauce
1 tablespoon cumin
1 teaspoon chili powder
1 teaspoon oregano
1/2 cup shredded cheese

IMG_7859

preheat oven to 400 degrees.
heat oil in a large skillet. add onions, garlic, and peppers and saute for about 5 minutes until onions are translucent. add corn, salsa, cilantro, and dry spices and simmer on low for about 5 more minutes. allow mixture to cool. add the cheese once the mix is cooled (basically you want to let the cheese melt in the oven instead of in the pan).
follow directions on the puff pastry box to thaw (probably about 40 minutes on the counter). once the pastry is thawed, roll it out on a floured surface to about 1/8". use a cookie cutter or a glass to cut little circles out of both sheets of puff pastry. add about a tablespoon of the filling to the center of each circle. rub a bit of water around the inner edges to help the sides stick and press with a fork around the edge to seal. prick the top a few times with a fork or toothpick to vent.
place the empanadas on a non-stick baking sheet and brush with egg wash (1 egg mixed with about a tablespoon of water). bake for about 10-20 minutes until brown.
makes about 9 small circle empanadas.

these came or really tasty and they were also adorable. next time i would make the pastry from scratch (though they may not be as flaky and puffy) , but i was making these for a friend's birthday party and i just wasn't feeling like all the fuss of making pastry dough too. shortcuts can be wonderful & yummy friends.

the bins

03 May 2009

something strange has happened to me. i have been posting to this blog for 2 months now and i realized that i have never even mentioned the bins. i tend shop there pretty often and i get a lot of great gems. i've been a little obsessed with it every since i first visited portland in 2002.

perhaps i need to explain, if you are not from portland, then "the bins" not immediately strike a chord with you. "the bins" is a term lovingly given to the goodwill outlet centers. goodwill stores essentially are always trying to turn over their stock so that there is always room for new items, so after about 6 weeks, they remove the items from the store and send them to the outlet for their last chance to be sold before they are recycled, turned to industrial rags, sent overseas, or sold to salvage brokers.

the glory of the outlet is that the clothes and housewares items are sold by the pound. one pound is $1.59. glass is .39 per pound. this price is for less than 10 pounds, however there is a bulk discount, so the more you buy, the cheaper it is per pound. the items are not neatly sorted and laid out for you, so there is a little bit of work that needs to be done to cash in on such a great deal. the items are dumped into huge movable plastic bins and laid out in aisles. each aisle is changed out ever few hours to constantly cycle the stock. usually a bin is filled with like items because that is how it came from the store, but not necessarily. there are textile bins, shoes, books, and "hard good bins" (aka everything else). there is also a section for bikes and furniture that are individually price (but priced cheaply and they are marked down in price each day they do not sell) the textile bins are not really any collection of a certain size or style, so little girls dresses are mixed right in with men's jackets. this just basically means you are in for a hunt.

i don't think my love of the bins comes out of my frugality so much as it comes from my love of a treasure hunt. there is something intoxicating about not knowing what you will find there (and the added bonus that it will cost next to nothing when you find it!). it does take some effort and you really need to be in a certain mood to be able to put in the energy, but i find the pay off to be worth it. there are actually a lot of people in portland that make their living by going to the bins and scoring amazing things for little money (the 50+ pound discount is much to their advantage) and then reselling the items. these people can be a little intense and get a bit wild when new stuff comes out.

portland is not the only place with a goodwill outlet. check this list for some places near you.

here are some quick tips if you decide to check out "the bins":

+ you might consider gloves if you are germphobic. remember that this is a collection of other people's donations and there could be some "undesirables". just proceed with caution. also, sometimes glass and things can break when they get thrown around on trucks and loaded into the bins or sharp edges can poke out, so be mindful before you throw your hands into the housewares sections.

+i tend to take the "take now, think later" approach for efficiency. if i find someone that looks mildly ok, i will throw it in the cart. then, after i'm done shopping, i stop and take a moment to carefully go through everything and check for stains or holds, make sure it would actually fit, and of course ask the important question "do i REALLY need this?"

+that being said...i won't lie, i am a totally scavenger. i do my best around the edges of the store or close to the registers because of other people doing the "take now think later" approach. someone else may have found some really cute things but realized they were not their size or they just didn't have a place for them, so they tend to leave a discard pile of some pretty awesome things.

+leave the kids at home. i see a lot of...umm...let's go with "disappointing" parenting going on at the bins. if your child can reach up and stick their hands into the bins, they might not really realize what they are grabbing at and could end up getting hurt. it's a pretty consuming shopping experience, so it seems it is just really hard to shop and also keep your attention to the children. i don't even want to tell you how many times i have seen a child grab something from a bin that has been who knows where and stick it in their mouth. gross. it is definitely a great place to get toys and clothes for your kids on a tight budget, but it is probably best not to take them on the trip.

+oxyclean is a gift from the heavens. seriously. get some at target and it will change your perspective on what is a salvageable item and what might be trash. i just got a cute pink vintage dress there on friday, but it had a little dinge to it (which just happens to a lot of vintage clothes) and i soaked it in the sink with oxyclean for an hour then threw it in the wash...now it is just as lovely and bright as they day it was purchased 40 years ago!


so, now that you know what the bins is...let me show you my amazing find from friday...
IMG_7841
BEST BELT BUCKLE EVER for $1.50! much love to katy for bringing it to my attention! she rules. it needs to be attached to a new, longer belt but wow! so amazing and perfect! i also got a lovely dress, some fabric, a cake plate, some books on canning, and a few other gems...but this crafty belt buckle is one of my favorite finds to date.

$5 meals: easy chickpea curry

02 May 2009

IMG_7831
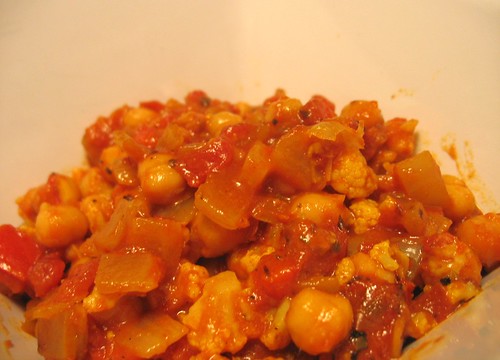
easy chickpea curry

1 tablespoon vegetable oil - .10
2 cloves of garlic - .10
1/2 medium onion finely chopped - .50
1 15oz can chickpeas (garbanzo beans)- drained and rinsed - $1
2 diced ripe tomatoes or 1 15oz can diced tomatoes - $1
1/2 head of cauliflower - chopped - 1/2 @ $1.50 = .75
1 red or yellow pepper - diced - .50
1-2 tablespoons curry powder (i used yellow, but use any kind you like) - .50
1/2 cup water - negligible
salt and pepper to taste - negligible


total = $4.45 makes 4 servings ($1.11 per serving)

heat oil in a large pot and add onion and garlic and saute until translucent. this should take about 5 minutes.
add cauliflower, pepper, and curry and saute for another 2-3 minutes.
add water, chickpeas, and tomatoes. simmer for about 15 minutes

ok, i admit, this might be a more like a $6 meal because it is best served over some basmati rice. but it's still very cost effective at less than $2 per serving and it's really delicious and filling!

some freebie tips for the day.

27 April 2009

things are tight for everyone these days. every little bit helps and i love a useful freebie, so here are a few i recently signed up for...

sign up for bath and body works email list and get a coupon for a free travel sized item. they also send some good coupons for freebies on the mailing list, so it's worth getting. just this past weekend, i got a free $8 lemon pomegranate lip conditioner (which i love) when i spent $1.50 on a lovely scented hand sanitizer.


sephora sends you a free birthday item if you are on their email list. i'm not sure exactly what, but might be worth signing up.


free reusable totebag when you make a pledge to sustain yourself.


bzzagent is this fun thing my friend krissy shared with me. you basically sign up and they will occasionally send you some free items and ask you to review them and pass out coupons if you are interested in them. it is an interesting site that works on the basis of word of mouth marketing.

also, if you shop at safeway, i really think this site is neat because it lets you add coupons directly to your club card rather than printing them and having to keep track of a million little slips of paper. i really want to be better at coupons, but i am just don't often have the energy to do it and i find it makes me by a lot of things i don't need.

vegan peach cupcakes with mango frosting

24 April 2009

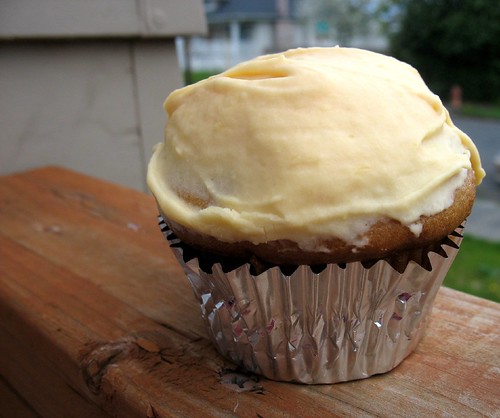
i purposefully used an almost identical recipe for the mango cupcakes for simplicity sake. you can easily whip up a double batch of unflavored batter and then seperate add the diffrent purees into the mix. i loved that these came out with a really strong, not too sweet mango taste.

IMG_7801


vegan peach cupcakes
1 tablespoon apple cider vinegar (don't worry about the smell, it bakes off)
1 cup of soymilk (flavored if you want...i used vanilla)
2 3/4 cups flour
2 teaspoons baking powder
1/2 teaspoon baking soda
1/2 teaspoon salt
1 cup sugar
1/2 cup oil
1 teaspoon vanilla extract
1/3 cup peach nectar
1/2 cup peach puree (i just used canned because it is not peach season)

preheat the oven to 350繙F.
put the cider vinegar into a small bowl and add the soymilk. whisk well. the mixture will start to thicken up or curdle (i know that sounds weird and gross and i was nervous, but trust me, this will work!)
stir together the flour, sugar, baking powder & soda and salt.
mix the oil, peach nectar, and vanilla extract into the bowl containing the soymilk and vinegar and then slowly add the wet ingredients to the dry ingredients and blend.
add peach puree and continue to blend.
scoop into cupcake wrappers. these will puff up a lot...more than most of the non-vegan cupcakes i make do. past vegan recipes i've made have ended up pretty flat, so as a caution i filled the wrappers almost to the top and got a really puffy dome top...so depending on what you are going for about 3/4 full is great.
bake for 20 - 25 minutes until starting to brown.


vegan mango frosting

1 cup (2 stick) vegan butter - room temperature
2-3 cups powdered sugar
puree of two fresh ripe mangos

bring cream cheese and butter to room temperature and beat together until creamy. add the mango puree.
add powdered sugar, 1 cup at a time, until desired sweetness and texture.
again, the puree will effect your ability to get a really stiff frosting, but i really think that nice strong mango flavor that came from using two mangos was worth a kind of goopey frosting.

my coworkers seemed to really love these as well as the strawberry ones. i think the key to this was using fresh mango, ripe in the frosting. you could try it with canned or frozen, but i cannot promise the same effect and delicious-ness.

vegan strawberry cupcakes and strawberry buttercream frosting

23 April 2009

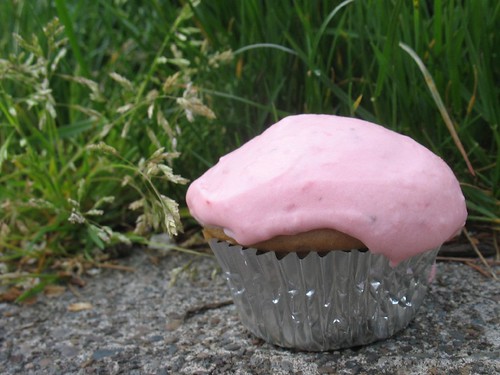
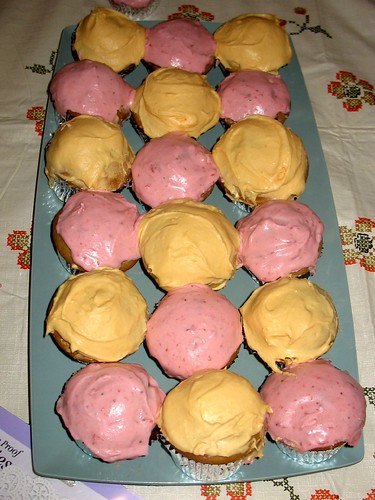
i really just wanted to go for the whole orange and pink work color scheme for the cupcakes i was making, so the logical choice to me for pink was strawberry since i have been dying to try my hand at strawberry buttercream. two of my coworkers are vegan. i am not a very good vegan baker, but i am working on it. it's important to me that if i am going to make something for work, hopefully it is something everyone will have the opportunity to enjoy. so, this is more adventures in vegan baking...

IMG_7795

the first step before you do anything else is to cop up a pint of strawberries (about 8oz) and add about 3/4 cup of sugar to them. let them sit in the fridge mixed into the sugar for at least 20 minutes (overnight is good too) so then can absorb the sugars and make a strawberry simple syrup. then mash them by hand or throw them into a blender. you will then use this puree for both the cake and the frosting.

vegan strawberry cupcakes
1 tablespoon apple cider vinegar (don't worry about the smell, it bakes off)
1 cup of soymilk (flavored if you want...i used vanilla)
2 3/4 cups flour
2 teaspoons baking powder
1/2 teaspoon baking soda
1/2 teaspoon salt
1 cup sugar
1/2 cup oil
1 teaspoon vanilla extract
1/3 cup strawberry nectar
1/2 cup mashed strawberries

preheat the oven to 350繙F.
put the cider vinegar into a small bowl and add the soymilk. whisk well. the mixture will start to thicken up or curdle (i know that sounds weird and gross and i was nervous, but trust me, this will work!)
stir together the flour, sugar, baking powder & soda and salt.
mix the oil, strawberry nectar, and vanilla extract into the bowl containing the soymilk and vinegar and then slowly add the wet ingredients to the dry ingredients and blend.
add strawberry puree and continue to blend.
scoop into cupcake wrappers. these will puff up a lot...more than most of the non-vegan cupcakes i make do. past vegan recipes i've made have ended up pretty flat, so as a caution i filled the wrappers almost to the top and got a really puffy dome top...so depending on what you are going for about 3/4 full is great.
bake for 20 - 25 minutes until starting to brown.


vegan strawberry frosting

1/2 cup (1 stick) vegan butter - room temperature
6 oz softened vegan cream cheese
2-3 cups powdered sugar

bring cream cheese and butter to room temperature and beat together until creamy. add 1/2 cup strawberry puree.
add powdered sugar, 1 cup at a time, until desired sweetness and texture.
you may want to add more puree to get a stronger flavor. i ended up using at least a cup i think, but it made for less firm frosting, so if you are concerned with having the frosting be able to be piped on, you may want to go easy on the puree. if you want to thin things out, just use some of the strawberry nectar. if you do not care to make this vegan, just use real butter and cream cheese...the effect is the same.


i was really happy with the results! i am not going to tell you that i think my vegan cupcakes are 100% as good as my cupcakes with egg and all the things i am used to using...there is definitely a different texture involved, but i think these were pretty darn good. i will absolutely make some version of the strawberry cupcake again in the next few months once it is officially strawberry season!

secretary's day!

so, i work for a really great company. we are a virtual receptionist company with about 35 women and one man. it's not a flashy job and at times it can drive me insane and wears me out, but they do their best to try to make the best of it and make it different than a call center and make i a really positive place to work which is really wonderful. i love my coworkers wholeheartedly and it's good to work in a place that i feel some love when i walk into it.

IMG_7780

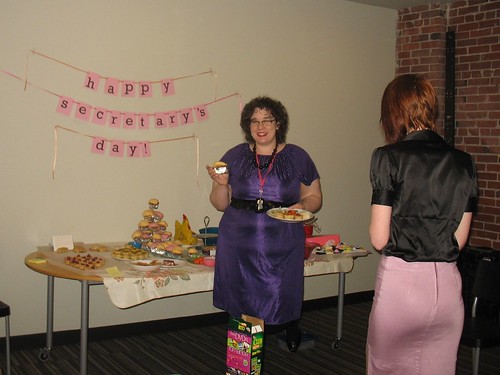
yesterday, april 22nd was secretary's day and since we work in an office full of secretaries, i helped organized a cute retro tea party potluck at work. it was completely adorable and eveyone in the office was sort of glowing with delight today. we asked people to dress up like old fashioned secrataries, rented a cute silver tea service, and decorated the conference room. i made this little banner and spent tuesday night baking cupcakes for hours and hours.


our work colors are orange and pink, so i made vegan mango cupcakes and vegan strawberry cupcakes. recipes coming next.

IMG_7775

tooth pain and a lovely weekend.

21 April 2009

i'm sorry i haven't updated this in awhile. it's not that i've forgotten about you. it's just that i got my wisdom teeth pulled about a week and a half ago and it turned into a nightmare of epic proportions. dry socket is one of the most painful things i've ever experienced and i don't wish it on anyone. i haven't really been eating and i spend a solid week completely doped up on pain killers watching a crazy about of tv and not being productive at all. i'm starting to feel better finally and starting to reclaim my life. it's spring and i am ready to be outside and enjoy the sun.

this past weekend was the first time i had been out in quite awhile and i was still not 100%, but it was really good to get out and see friends.

katy, jay, and i went to "oregon's largest garage sale" at the expo center on saturday which was essentially one big flea market of my dreams. the one thing about portland that i do not love is that there are no flea markets. i miss the east coast flea market mornings of walking up early with my mom and walking around for hours finding new and old treasures among miles of overflowing tables. this was kind of a throw back to that and it was really amazing. i came home with some amazing things.

kitchen
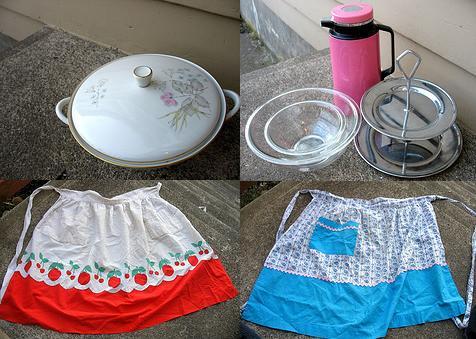
vintage kitchenware is really a soft spot for me and i have been on the hunt for a few pieces for serving. i managed to get this lovely russian serving bowl for $2, a set of two pyrex mixing bowls for $1.50, a pink spouted thermos for $2, a silver 2 tier serving tray for 50 cents, and two adorable vintage aprons for 50cents each. smitten kitchen.

IMG_7759
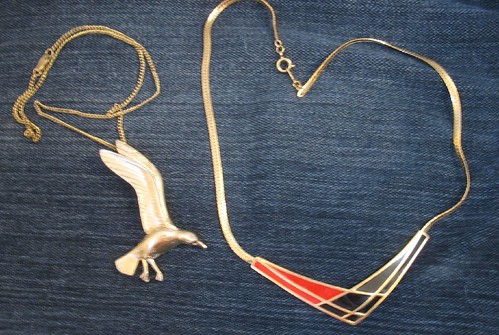
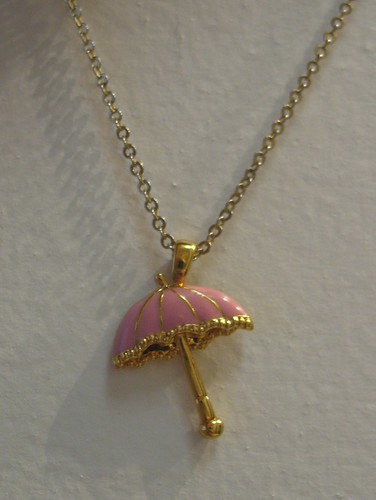
i also have been getting more into jewelry as of late. i bought two gold necklaces. one is a big albatross (or maybe a seagull?) and it's a little out of control, but i like it for $3. the other was just a simple red & black geometric design that i think will be lovely with some of my favorite dresses ($1). my absolute favorite jewelry find of the day though was this darling pink umbrella necklace...
IMG_7766
it was probably meant for a baby, but when you live in a city known for the rain, the icon of an umbrella takes a new meaning close to your heart. and it's pink. i am in love, excellent use of $4 and i can't wait for wear it out.

i also got some other little trinkets and gifts for friends while i was there, but the long and short of it is that whoever put this event together is wonderful and deserves my thank yous and i cannot wait for it to happen again. i didn't get to spend as much time as i might have dreamed there because i was sick, but it was still great. ANNNND! there was a pet expo there the same day in a different building so it was wonderful to be able to bring ellie and let her socialize with other dogs. i picked up some great little treats and toys for her. she even got a couple of new little shirts this weekend...more on that soon.

i am so glad it is garage sale season again.

sunday brunch

06 April 2009

i had a few of my favorite people over for a sunday brunch. breakfast food is some of my favorite foods to make because they are so simple, but i don't often have time to cook any real breakfast during the week (i live on frozen waffles and veggie sausage at work).

here is what i made:

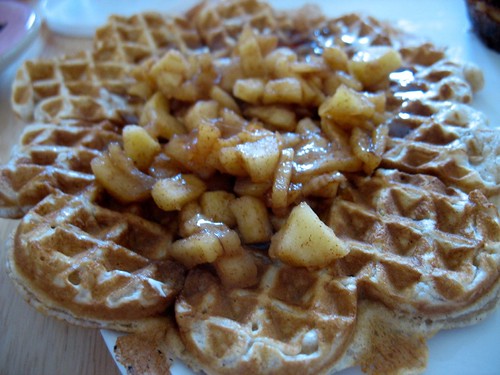
IMG_7694

apple cinnamon waffles

start by dicing up 3 apples (i like ambrosia, honey crisp, or gala...but any variety you like is fine!) and adding them to a small saucepan with 1 tablespoon of butter, 2 tablespoons sugar, and 1/2 teaspoon or so of cinnamon. cook on medium for about 5-10 minutes, stirring occasionally until softened. set aside.

make the waffle batter:
1 cup flour
2 teaspoons baking powder
2 tablespoons sugar
1/4 teaspoon salt
1/2 teaspoon cinnamon
1/8 teaspoon nutmeg
1 cup milk
1 egg
1 tablespoon melted butter
1/2 teaspoon vanilla
1/2 cup of your apple mixture

heat waffle iron. combine flour, baking powder, sugar, salt and spices. set aside. combine milk, egg, butter, apple and vanilla. add dry ingredients. stir until well moistened, but still lumpy. pour about 1/2 cup onto greased, hot waffle iron. bake until brown and crisp. serve with syrup and apple mixture as topping.
IMG_7692

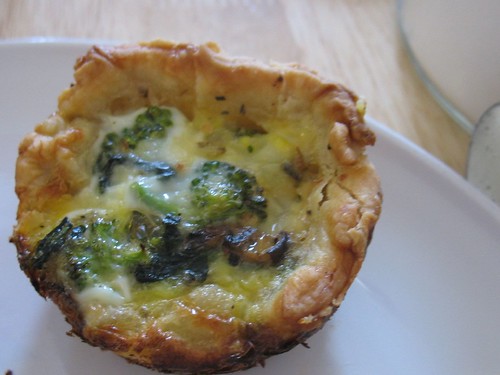
veggie & gouda mini quiches

you can make these with or without a crust. i used a bit of homemade pie crust that i froze after mini pie making, but you can also use frozen store bought crust. i rolled the crust to about 1/4" and laid into greased muffin tins. i pre-baked the crusts for about 10 minutes @ 400 degrees. then, follow the instructions below...

4 large eggs
3/4 cup milk
vegetables! you can really use anything you have on hand (i used 3 stalks of asparagus, 2 mushrooms, a bit of chopped spinach, broccoli, and some diced onion)
1 clove pressed or chopped garlic
large handful of grated cheese (i used smoked gouda, but you can use just about any cheese)
about a tablespoon of flour
salt & pepper
preheat oven to 350繙f. saute your veggies together just a bit until they soften, then set aside. in a large bowl, whisk together eggs, milk, salt, pepper, herbs of your choice, grated cheddar, and flour. grease a muffin tin with butter...like really, grease it really well or they will be a mess to get out. add a small layer of sauteed vegetables to the bottom of each cup and then drizzle egg mixture over each muffin cup, fill almost to the edge. bake for about 20-30 minutes. this will make about 5-6 mini quiche.


simple biscuits with vegan mushroom gravy

basic biscuits
2 cups flour
3 teaspoons baking powder
2 tablespoons sugar
1 teaspoon salt
1/3 cup oil
2/3 cup milk
mix dry ingredients. put oil in measuring cup and add milk. do not stir. add to dry ingredients.mix lightly to moisten ingredients and knead one or two times to form ball. roll out to about 1/2" thick. cut into 2" biscuits. bake on an ungreased pan at 475F for 10-12 minutes, until lightly browned. note: these were pretty dry, i wouldn't make this for a stand alone biscuit, but they were just fine as an quick and easy mate to gravy!
& top with...

vegan mushroom gravy
8 oz mushrooms, sliced (any kind of mushroom will do)
1/4 C sliced onions
1-1/2 tablespoons oil
1/2 C white flour
2 tablespoons oil
4 cups stock or soy milk
1 tablespoon soy sauce
1/4 tsp black pepper
lightly saut矇 the sliced mushrooms and onions in the 1 1/2 tablespoons oil. in another pan, combine and bubble the flour and 2 tablespoons oil over low heat for one minute. whisk in the stock or soy milk, along with the soy sauce and black pepper. cook until thickened, whisk out any lumps. stir in the mushrooms and onions. you can serve it up just like that, but i like to get the emulsion blender out and blend the mushrooms down a bit for a better flavor and consistency.

spring.
05 April 2009

spring is peeking it's head into my life just a little. things around town are starting to bloom just a bit and i am getting excited for the way this city comes alive in the spring as if out of a rainy winter hibernation. spring is just taking it's time and playing the game it always does with alternating between beautiful sunshine to rainy miserable every few hours. i like to think that if portland weather was my boyfriend, we would probably have to break up because of it's instability. but still, i love the city i live in and a love the sunny days we've been having these past few weekends. it makes me hopeful and excited.

IMG_7678

we went to the hoyt arboretum last weekend just to escape the city for just a little while and it was really lovely. in almost 6 years living in portland, i cannot belive i had never been there. it's a beautiful place to spend a day and it's totally free and easy to get to on the max.

spring is bringing new excitement. i'm looking forward to day trips to the coast, garage sale weekends, picnics in the park, farmers markets, fresh flowers, sunshine, and all those little sweet things i have been missing.
also, this week, i picked up "cooking outside the box: easy, seasonal, organic"
by keith abel
on clearance rack at barnes and noble this past week and i have to say that i am kind of enchanted. i've been looking for a good seasonal cookbook and i am smitten with the recipes and whimsy photography. i can't wait to try some things out. and yes, i did just nerd out over a cookbook.
fun with felt!

03 April 2009

felt is one of my favorite materials to play with. it doesn't fray, it's super cheap, readily accessible and it is thick and a little stiff so it is easy to cut into shapes and hold it's own. one of my nerd-tastic friends was having a birthday, so i wanted to give her something handmade and accommodating to my very small budget. this is what i came up with...

IMG_7689

i added a sew on pinback so it can be displayed anywhere. it's just a little cut out with a little hand sewing and it costs just a few cents to make, but i think it turned out adorable and it was super personal for my computer nerd, dorky glasses loving friend. she loved it.

freebie. free amazon gift certificates rule.

31 March 2009

so, i am really into freebies of any kind as you might imagine. this is one of my recent favorites that i wanted to share thanks to jen....

swagbucks is just a basic search engine not unlike google or ask.com, but with swagbucks you log in and you get awarded a point for a every few searches and then you save your points up for prizes. i am using a search engine all day at least a few times a day anyways, so i get at least a point or two a day without doing anything different than what i normally do (and you get points if people sign up with your referral and do searches). $5 amazon.com gift certificates are 45 points, so i get one sent to my email about every month or so just for doing the things i do anyway.


if you are interested, you should sign up for swagbucks. it can't hurt...free stuff is awesome, i've done it and it is completely legit and they have never sent me a bit of spam which is also great. and so far, i am 1/3 of my way to getting the cupcake courier of my dreams for free! :)

$5 meals! african peanut stew!

30 March 2009

i decided i would like to work on my grocery shopping and challenge myself to be better at keeping track and making my meals a little more economical.

i would like to try to be proactive about sharing some $5 or less meals that i enjoy. some of them might be a little lack luster and not very glamorous looking, but they are good and filling and really work in an everyday situation when you are working with budget and also working with time constraints of working full time. not boring, but just simple. sometimes i find those really easy everyday kind of ideas helpful and i hope you will too!

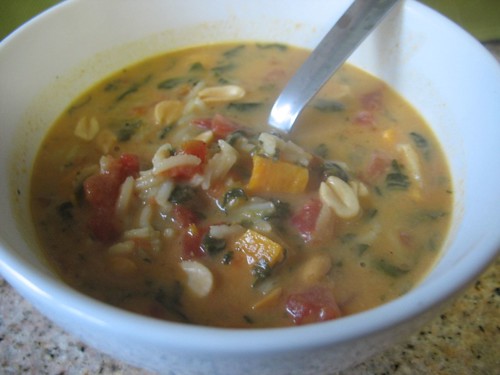
last night, i tried something sort of different and i really loved the way it turned out. i love soup. i think it is such a wonderful versatile meal and i love that it is easy to store and freeze, but i felt a need to try something different from my normal path. this peanut stew was inspired by my favorite soup at a local pub and it turned out really wonderful, it is really hearty and it is actually not too overwhelmingly peanutty. it also heated up super well the next day for lunch...it was maybe even better the second time around.

african peanut stew
IMG_7616
ingredients:
1/2 cup onion, diced - 1/2lb @ .48/lb = .24
1 tablespoon toasted sesame oil = >.10
2 cloves garlic - pressed or minced = .05
1 cup instant brown rice - - 1/4 pound @ .97/lb = .25
2 cups medium diced peeled sweet potato or yam - - 1/2 pound @ .88/lb = .44
1 can (14.5 ounce) diced tomatoes with liquid - $1.28
1/2 teaspoon salt - on hand/negligible cost
1/2 teaspoon pepper - on hand/negligible cost
1/2 teaspoon ground ginger - on hand/negligible cost
2 teaspoons curry - on hand/negligible cost
1/2 cup creamy peanut butter, reduced-fat - approx 4oz = .50
2 cups fat free milk = .50
3 cups (3 ounces) spinach leaves, coarsely chopped - 1/4 bag @ 1.28 = .32
1/4 cup chopped roasted peanuts - 1.58/lb - 1/8 pound - .20
Green onion or cilantro, thinly sliced, for garnish (optional)
total cost = $3.06 makes 6 servings. cost per serving = .51

directions:
1. in a large pot, saut矇 onion and garlic in sesame oil until translucent.
2. add stock, rice, sweet potatoes, tomatoes, and spices. bring to a boil, then turn
down to medium low, cover and simmer for 10 minutes.
3. stir in peanut butter and milk. if you are using frozen spinach, add it now...if you are using fresh, wait a few moments to add so it doesn't get overcooked. bring to gentle simmer and cook uncovered for 5 minutes.
4. if you are using fresh spinach, add in and cook until wilted, 2 to 3 minutes. remove from heat.
5. ladle stew into bowls and top with peanuts and green onion or cilantro, if desired.

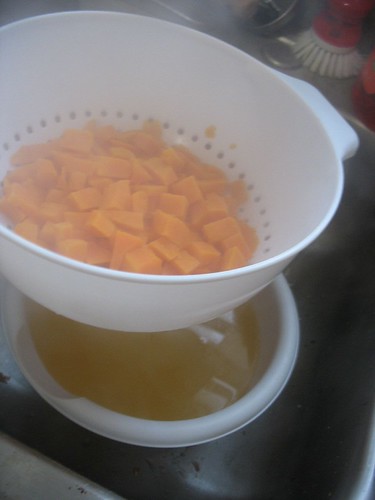
i found that this recipe as is was really thick, so you might want to add more liquid. i did that by using the starchy sweet potato water left over from the next recipe (about 2 cups), but you could also use more stock or milk or water.
IMG_7606


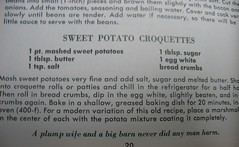
i also ended up having more sweet potato than i needed for this recipe, so i wanted to try my hand at one of recipes in my pennsylvana dutch cookbook from the estate sale this weekend. and it was super simple. (and i also loved the little quote below it about a plump wife)

IMG_7596
(click the image for the larger instructions)

the egg white thing was more a mess than it was worth and i had a hard time getting my patties to get too solid but that could have been because i did not chill them long enough or because i used an emulsion blender to mash the potatoes which perhaps mashed them too well. but these were just sweet little nuggets that took little effort to prepare, so it was a nice use of left over sweet potato. also, make sure you use just white bread crumbs for this...no fancy herbed stuff because it is a sweeter kind of dish. these turned out just fine, nothing fancy but a good little side that was a little different than just a pile of mashed sweet potatoes!

ready! set! yard sale!

i am a really serious yard saler. like the kind of yard saler that maps things out the night before and then goes to as many sales as possible from about 9 or 10 am until 2 or 3pm when all the sales are pretty much shutting down and i do not have a choice. it's my vice. my weekend treasure hunt. my addiction if you will.

i've learned quickly that few people can handle my stamina. not everyone wants to drive around going to yard sales for 5 hours in a day even if they do love a yard sale. and then i met katy. katy is my yard sale soulmate. she can handle 5 hours of sales without a problem and she is darn good at the hunt with great insight and a keen eye for treasures. katy had been working weekends for the past year, but she just quit her job and i am pleased as punch to have my saturday yard sale date back! in addition, katy is also a really amazing friend so i love that we get to spend that super good bonding time together. who needs a $5 cup of coffee when you can go out and score 5 new dresses for that $5?

IMG_7590

portland is still a little rainy and spring has not fully shown it's face yet, but we couldn't wait to start (given katy's new freedom and all), so we braved the rain and started our yard sale season this weekend!

there were a surprisingly good amount of estate sale and rummage sale listings for a rainy saturday. we went to three church rummage sales. rummage sales are always a favorite for me. rummage sales tend to be better than most other types of sales because a)they are filled with donations from many different families in one place b)the person who prices items is usually not it's previous owner, so you are less likely to run into the "i think my junk is worth so much" kind of attitude and c)the last few hours of a rummage sale often equal half off everything or a great "fill a bag for a few bucks" kind of deal.


rummage sale scores included: 2 silver chains for 50 cents (i have a lot of cute charms that need a place to go), a brand new sealed eyelash curler for 5 cents, little apple pin for 5 cents, and an amazing spinning spice rack that will take care of all of my bulk spices cluttering the cupboard (and it has a little dial that you click and it automatically measures 1/4 teaspoon) for $2.

IMG_7557
we also stopped at a few estate sales. one was in the hollywood district and was so crowded that there was a line outside even though it was well after noon. we waiting in the rain anyway and found made it in to happily pull though piles of old ephemera and vintage treasures.


IMG_7563
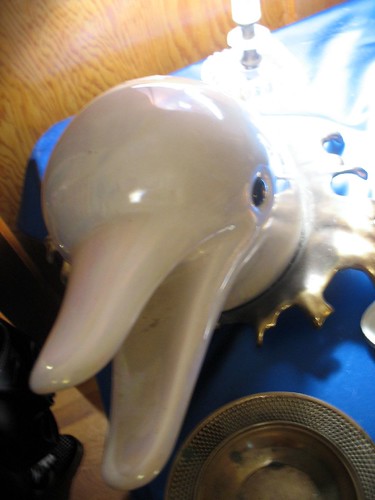
weirdest thing i saw this weekend? this really intense life-sized porcelain dolphin head mounted onto a brass wave like thing. i am not even sure what you would do with this. the photo does no justice to how creepy it was. also, they wanted $22 for it.


IMG_7576
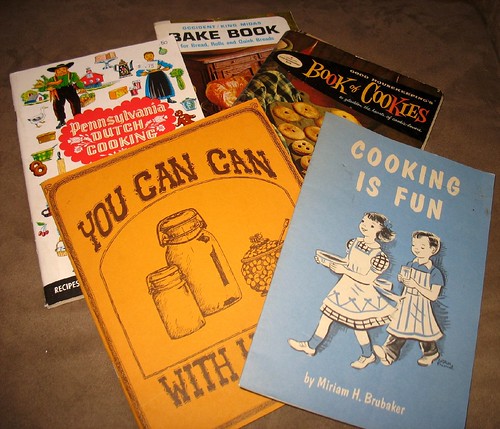
my favorite finds today was a bunch of great old cookbooks that came from a few different sales and were about 50 cents each.
i am excited to try out some of the jam recipes this summer in "you can can with honey" booklet. it seems that the honey can act as a replacement for pectin and sugar in most cases if you add it with tapioca flour. it will be an interesting experiment i guess!
most of my heritage is pennsylviania dutch and it's influence is really prevalent in the area i grew up and though i am sadly not very in touch with that history, i was really excited to find this old book about pennsylvania dutch cooking! it was printed in the 50s and though a lot of the recipes are really intense and some involve pigs feet, but most of them are really nice simple old fashion cooking. i am excited to try a few of these things.
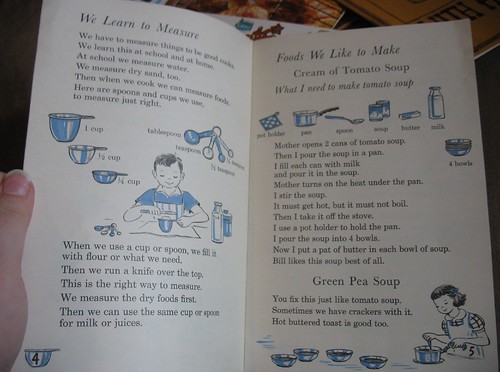
i also got a couple of other good baking recipes from the 50s about baking bread, baking cookies and this sweet kids book with step by step instructions and cute illustrations for few basic recipes.
IMG_7570

simple baby things.

24 March 2009

someone wonderful in my life is having a baby in a few weeks and i really wanted to make her a simple little token of appriciation and support. i am not really a baby person. i don't know much about what a new mom needs, but decided on a really simple, but cute handmade bib.

this whole project probably costs about $2 (depending on your fabric of course) or so and takes maybe a half hour, but i think this makes a really sweet gift.

IMG_7533
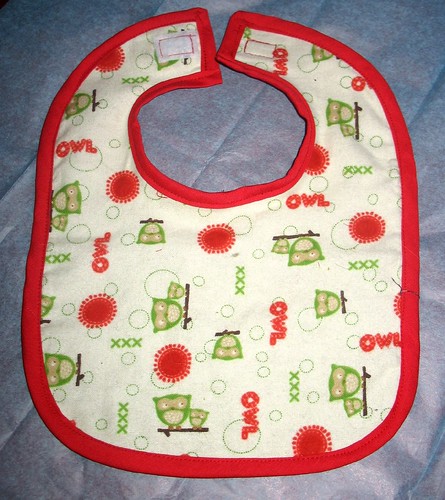
i used a great pattern from jill and just cut out one layer of flannel (i had this really cute owl fabric that i got on sale at joanns that had been mulling around my craft room for months, so i was excited to use it) and one out of a clean recycled terrycloth towel. then you just need to iron and sew the two parts together (no need to make super perfect edges because you will be covering this stitch with bias)...you might not even need that step, but i found having the two peices already sewn made adding the bias tape easier. next, you just find a corodinating bias tape...i used 1/2", but you can use whatever size you think looks best...and sew it around all the edges and inside the neckline. you could add snaps for a fastener at the top, but i just used some simple velcro squares. and voila! easy peasy baby bib that is both cute and easy to throw in the washer!

b
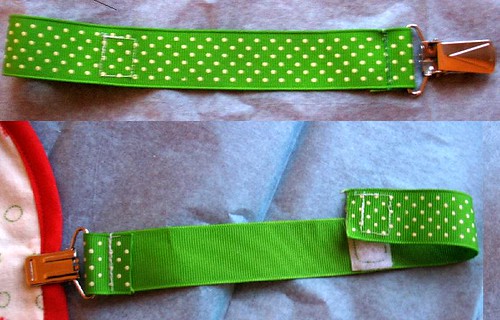
i also made a little pacifier holder for her. it is basically just a some cute ribbon and a bit of velcro stitched at one end to form a loop to hold the pasifier and then a little clip (i got a 2 pack of suspender clips from joanns, but you could also use little name badge clips from an office supply store) sewn on to the other end that clips to the baby's shirt. again, i know very little about babies, but my coworker tells me this is a very valuable little tool to keep pacifers off the floor.

ooooh my darlin clementine..vegan cake!

18 March 2009

last week, i realized that my big wonderful bag of clementines (left over from the clementine cupcakes last week) were getting a little shriveled and i was just not going to be able to eat them fast enough to safe them. then i remembered that i saw a recipe on the vegan yumyum blog about candying clementines and a clementine cake, so i got to work!


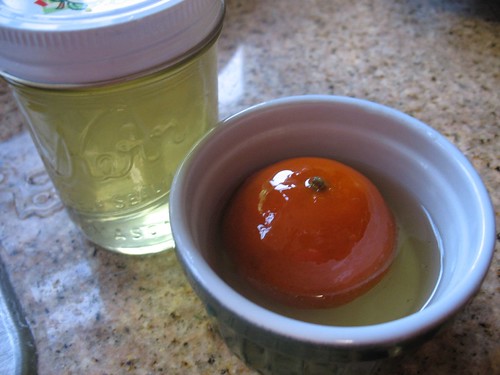
step one was candying the clementines...
IMG_7366
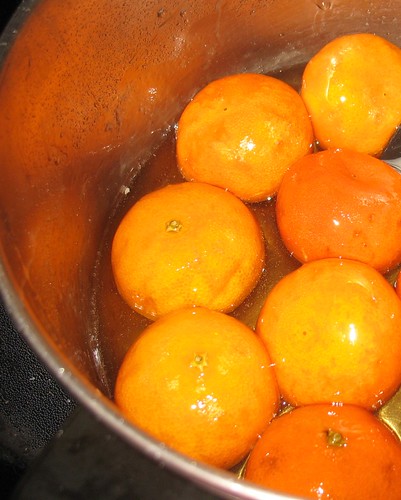
when you candy citrus, it makes the peel and rind completely edible. i had about 8 or 9 good clementines left, so i pierced them 8-10 times and added them to about 3 1/2 cups of sugar and 2 3/4 cup of water in a big pot and let them simmer for about an hour (according to lolo, you can simmer these for 1-2 hours, but the longer you simmer - the more bitter they will be).

IMG_7375

i was hoping to get a nice sweet candied clementine out of this process that i could maybe eat up with some cream fraise or something, but mine turned out quite bitter after an hour and i am not sure that i could deal with the idea of eating them just as they were. it might have been some mistake i made along the way, but after i drained the clementines out, i did end up with clementines with edible peel that were great to blend up for the cake and also some wonderful clementine flavored simple syrup for drinks and desserts in the future (make sure you save that part!).

IMG_7380

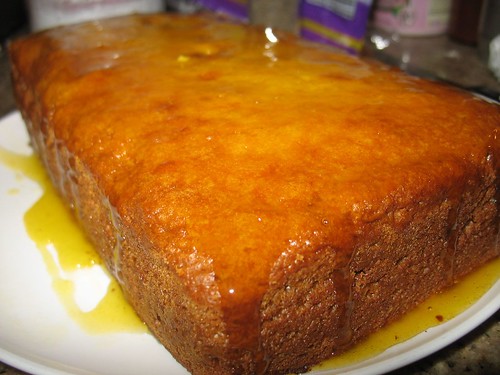
next, i started making the cake. i blended up the drained clementines with my emulsion blender to get about 1 1/2 cup of puree and added it to: 1/2 cup vegetable oil - 1 1/4 cup soymilk, or other non-dairy milk - 1/4 cup sugar - 2 cups all-purpose flour - 1 1/2 tsp baking powder - 2 tsp baking soda - 1/2 tsp salt. and i baked it for about 45 minutes on 350.

i also attempted the fondant on lolo's site, but i failed and it became more of glaze...which was less pretty, but very yummy. really, you just need to make sure you look at the vegan yum yum site because her photos are a million times more elegant than mine and she has a lot more detail on the process which is really helpful.

after all was said and done, there were some things that didn't work out just right, but it made a really good vegan cake with a nice balance of savory and sweetness. i brought the cake to work and my coworkers all were really into it and i got a ton of compliments, so i will call it a success.

pink lemon cupcakes

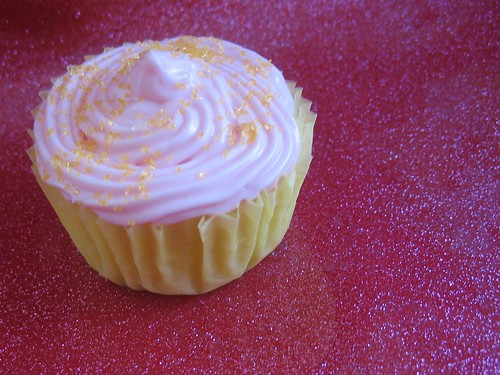
as i mentioned in my last post, i had a "cupcake baking cheer-up a friend date" this weekend which was pretty great. there is something really wonderful about being in the kitchen and working on projects together while you are doing a little soul pouring and then in the end, there is this pretty little sweet product. and let's face it, you can't help but smile when you see cute little cupcake all decked out with pretty frosting and sparkle sugar.

IMG_7403

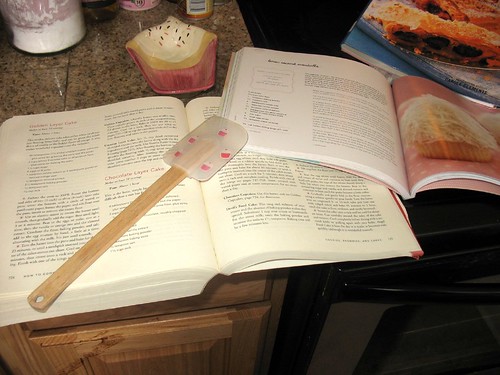
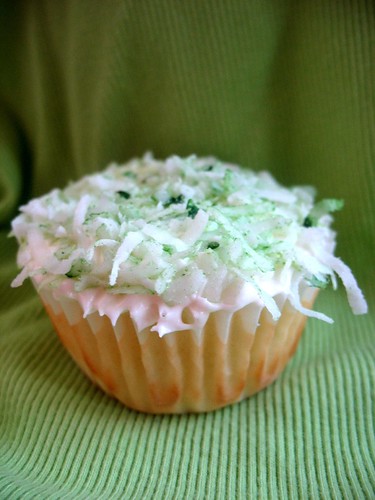
we pulled out the baking books and supplies and just started to wing it a bit. and yes, those are tiny cupcakes on the spatula on top of my cupcake book, next to my cupcake spoon rest...i am a big nerd. we decided on coconut lime cupcakes (see my last post) and a batch of pink lemon cupcakes. as you can see both recipes are really similar with a few small exceptions, so we really just made a double batch of simple vanilla cupcakes and divided it in half and did the citrus-ing to them and switched up the frostings a bit and the result was two completely different tasting cupcakes that were both really delicious.


IMG_7436

basic lemon cupcakes!
makes about 12 cupcakes

1/2 cup (1 stick) unsalted butter, room temperature
1/2 cup sugar
2 large eggs
1 1/2 cups all-purpose flour
1 teaspoon baking powder
1/8 teaspoon salt
1/2 cup milk
1 teaspoon vanilla
zest of 1 lemon
juice of 1 lemon

beat butter on high until soft, about 30 seconds.
add sugar. beat on medium-high until light and fluffy, about 3 minutes.
add eggs one at a time, beat for 30 seconds between each.
whisk together flour, baking powder, and salt and add to the mixture. add the milk and vanilla. mix to combine.
add the zest and the lemon juice and blend thoroughly.
scoop into cupcake papers about half to two-thirds full (depending on whether you want flat or domed cupcakes).
at this point, heather threw in a handful of shredded coconut to add texture and flavor, but that is optional. i personally didn't like that texture, but a lot of people loved it.
bake for 22-25 minutes until a knife or toothpick comes out clean.

grenadine frosting!

1/2 cup (1 stick) butter - room temperature
6 oz softened cream cheese
2-3 tablespoons of grenadine
2-3 cups powdered sugar

bring cream cheese and butter to room temperature and beat together until creamy.
add powdered sugar, 1 cup at a time, until desired sweetness and texture.
add grenadine one tablespoon at a time. grenadine is a syrup, so it can easily overwhelm your frosting with that syrup-y flavor...just be sure to add it a bit at a time until you get a taste you like.


these sort of reminded me of a little cocktail in cupcake form and i really loved them. nothing cures a hung over sunday with a little cocktail cupcake.

ps...i promise i will start blogging and making things OTHER than cupcakes soon!

coconut lime cupcakes!

yesterday was st. patrick's day. i guess don't feel any great attachment to the holiday because i feel no great attachment to its catholic roots or history and i'm not irish (as far as i know). but in case you are really into the whole green st patty's day thing, i have something green for you!

these were actually something we made up this weekend completely unrelated to st patrick's day. my friend, heather, was feeling really down this weekend, so we decided there was no better solution for that than to bake up some yummy cupcakes!

we actually made 2 types, but i will post the other in a bit.

IMG_7442

lime cupcakes!
makes about 12 cupcakes

1/2 cup (1 stick) unsalted butter, room temperature
1/2 cup sugar
2 large eggs
1 1/2 cups all-purpose flour
1 teaspoon baking powder
1/8 teaspoon salt
1/2 cup milk
1 teaspoon vanilla
zest of 1 lime
juice of 1+ lime
handful of shredded coconut (optional)

beat butter on high until soft, about 30 seconds.
add sugar. beat on medium-high until light and fluffy, about 3 minutes.
add eggs one at a time, beat for 30 seconds between each.
whisk together flour, baking powder, and salt and add to the mixture. add the milk and vanilla. mix to combine.
add the zest and the lime juice. we wanted to get a really tart cupcake with a really distinct lime flavor, so we probably used about the juice of 2 limes, but one lime is good for a more mild flavor.
scoop into cupcake papers about half to two-thirds full (depending on whether you want flat or domed cupcakes).
at this point, heather threw in a handful of shredded coconut to add texture and flavor, but that is optional. i personally didn't like that texture, but a lot of people loved it.
bake for 22-25 minutes until a knife or toothpick comes out clean.

coconut frosting!

1/2 cup (1 stick) butter - room temperature
6 oz softened cream cheese
1 teaspoon coconut extract
2-3 tablespoons coconut milk or coconut cream
2-3 cups powdered sugar

bring cheese and butter to room temperature and beat together until creamy.
add coconut milk and extract and continue to mix.
add powdered sugar, 1 cup at a time, until desired sweetness and texture.
the coconut milk makes this really wonderfully light and fluffy if you allow it to beat for an addition few minutes. if you would prefer a more thick piping consistency, you only need to beat this up until fully combined.

this is seriously the best coconut frosting i have ever made. it was light and fluffy and had really great taste to it and was not at all too sweet. i am kind of adverse to too much sweet in a cupcake frosting...which might explain why just about all the frostings i make are cream cheese based. i think cream cheese is a good balancer. i am considering adding the left over coconut frosting to some lemon crepes later this week even. stay tuned.

we topped the cupcakes with some shredded coconut that i died green to give it a spring-y look. how do you dye coconut? well you put regular shredded coconut in a jar or tupperware with a couple of drops of liquid food coloring and just shake the heck out of it until the color disperses through the coconut. easy peasy.

my love of mason jars continues...in pie form!

09 March 2009

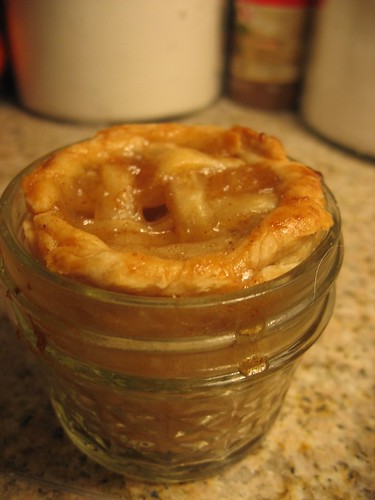
IMG_7334

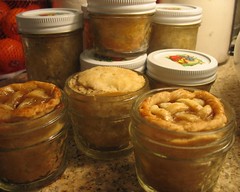
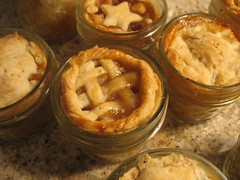
so, you know how i made that post about how much i love mason jars? well, on my list of all the amazing things to do with mason jars, i had almost forgotten that i saw the post on not martha about these tiny jar pies about a year ago, but they had quickly fallen to the bottom of a busy to do list...and then a post from little birdie secrets reignited my obsession and i just had to make these!

i had a bunch of 8oz jars and 4oz jars left over from summer jams, so this was a great way to put them to work. i found that the tiny 4oz jars were actually perfect for a cute little hand held portion of pie, but my boyfriend, bryan, thought they were too small to consider a portion...we can both agree a portion size depends on the person i suppose.


i used a basic pie crust recipe:
2 1/2 cups all purpose flour
1 cup (2 sticks) of cold butter
1 tablespoon of sugar
1 teaspoon salt
about 3/4 cup cold water

making a good pie crust is not that difficult, but it can be time consuming and it is all about technique, i found this tutorial at smitten kitchen incredibly useful for this part!

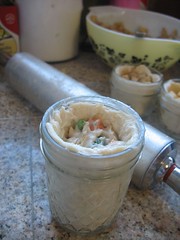
then, once you have your crust ready and it has had time to chill roll out the dough to about 1/4 inch or so. i found that there was not a really great technique to lining the jars, so you can just carefully grab a section and shove it in and just do some pressing along the sides.

IMG_7305

i made 3 different fillings just to try some things out. i made a really basic traditional pear and apple sweet pie filling. i also wanted to experiment with simple dinners, so i also made a really easy (aka lazy) vegatarian chicken potpie (which was basically some frozen mixed veggies, sauteed onion, faux chicken strips, cream of mushroom soup, and some rosemary and spices of your choice) which i plan to heat up again tonight for dinner.

i would recommend not over filling them because even though they are tiny, they sure will bubble up, so next time i would make sure there is a bit of extra space for the filling to bubble up and move a bit without a volcanic erruption.

IMG_7323

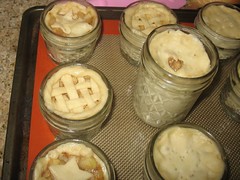
i put them on a silpad to keep them from moving around when taking them out of the oven (i would say this is a pretty crutial step so you don't end up with an oven coated in pie filling) and baked them for about an hour at 400 degrees. the nice thing about little clear jars is that is it very easy to see when your pies are actually done when they reach that nice golden brown color, so just keep checking on them. the 8 oz ones took a bit longer than the 4oz jars.

IMG_7356 IMG_7338

the wonderful thing about these is that you can keep them frozen and just take them out for homemade pie on demand. they also would make absolutely wondeful gifts either all baked up or frozen with instructions on baking.

IMG_7350 IMG_7352
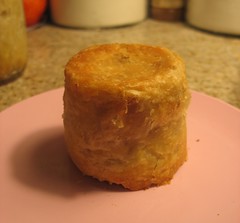
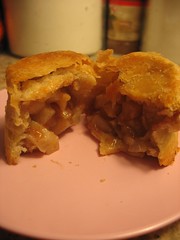
the pies are easy to pop out of the jar by just slipping a knife down the side and a bit of tapping, but i also think they would be just fine eaten right out of the jar!

pie in jars is just the begining. i am now a bit addicted and cannot wait to try out little cupcakes in a jar or other fun desserts and things. my world has been rocked a little by the idea of cooking in jars. yeah, i am that much of a nerd.
 
Blogging tips