Showing posts with label vegan. Show all posts

Mango Sticky Rice Inspired Tart with Coconut & Cashew Crust!

05 May 2014

Mango Sticky Rice Inspired Tart with Coconut & Cashew Crust

I love, love, love mango & sticky rice.  It is so simple, but it's absolutely my favorite dessert of all time.  Something about sweet, fresh, ripe mango with the chewy rice and sublime sweet coconut sauce...it's just such a magical and perfect combination and I can't get enough of it.  When in Thailand, my goal was pretty much to order it every single time I could and it was glorious.

Once I got home, I had a late night, jet lag fueled stroke of genius - what if I put my perfect dessert into a tart?!  YES!  So I obsessively write myself a note on my phone to remember when I woke up and I spent a few days thinking about the best way to make my dream a reality.

The result was beautiful and amazing.  Maybe one of my favorite things I've ever made.

I decided to go for a basic cookie crust with an addition of coconut and cashew for a little extra crunch.  Crunch is the one thing that I thing could elevate the perfect dessert, so this crust was perfect and the flavors match really well without taking anything away from the beauty of the simple mango and coconut flavor combination.  The filling is like a nice, thick rice pudding and it doesn't require specially steamed sticky rice to get a nice flavor and texture.  It can also very easily be made vegan or not by just using a non-dairy butter in the crust!

This tart looks beautiful and impressive, but it's not very hard to make and the parts can be made ahead of a time and assembled before a big event.


Mango Sticky Rice Inspired Tart with Coconut & Cashew Crust

Crust:
2 1/2 cups graham crackers or vanilla wafer cookies *
1/2 cup toasted coconut
1/2 cup toasted cashews
5 tablespoons butter, cut into cubes *

*for a vegan tart, just use graham crackers and non-dairy butter or coconut oil

Preheat the oven to 350 degrees.  Combine graham crackers, coconut, & cashews in a food processor.  Pulse until ground to a thick powder texture.  Add butter and blend until the mixture comes together and starts to stick to the sides. Use your fingers to pinch the mixture and make sure it is sticking together, if not you need to add a bit more butter.  Lay the mixture out on a tart pan or springform pan and use your fingers press a thin, even layer along the bottom and sides.  Bake the crust for about 15 minutes until browned.   Let cool before filling.

Filling:
1 14oz can coconut cream (not coconut milk, make sure it's cream)
3 cups cooked jasmine rice
2/3 cup sugar
1 tablespoon cornstarch
1 tablespoon water
1 teaspoon salt

Whisk together the coconut cream, rice, and sugar.  Mix the cornstarch and water well to make a slurry and add.  In a large pot, heat over medium high heat for about 10-15 minutes to thicken.  Stir constantly.  Remove from heat and chill in the fridge for about an hour until fully cooled and thickened.

Assemble to tart by spreading the filling over the crust.  Cover with the mango and serve.

Mango Sticky Rice Inspired Tart with Coconut & Cashew Crust

The pretty rose effect is super simple to do, just lay your mango slices in a circular pattern, starting with the outside and working your way inward, layering the previous layer slightly until you get to the center.  Cut a few smaller petal shapes for the center circle and finish by rolling up a slice.  I used two varieties of mango which is why I have this gradient color and I liked that effect, but you don't need to get all fancy - just use whatever variety is available and ripe.

Mango Sticky Rice Inspired Tart with Coconut & Cashew Crust

Whether you are a mango sticky rice fanatic like me, or you just want to give it a try - this is a perfect crowd pleaser with beautiful presentation!

What is your favorite dessert of all time?

Thai Curry Corn Chowder!

30 September 2013

The air is starting to get a chill and the rainy season is coming in with a vengeance.  It's the time of year to cuddle up under blankets with a good book.  It's also the time of year to when few things really hit the spot for me like a big warm bowl of soup.  Soup is such a versatile thing that is ripe with endless possibilities.  Soup season is a time to get creative and find new ways to break out the stockpot and experiment with finding that perfect match up of flavors and textures that just hit that spot right down in your soul.

This week, I happen to have found one of my new favorite comfort foods - Thai style curry corn chowder.  It combines two of my greatest loves (classic corn chowder + curry) into a dynamic, spicy, creamy bowl that is sure to warm even the coldest of nights.  I will never look at corn chowder the same!

Thai style curry corn chowder

Obviously coconut milk is a tried and true paring for curry because it adds that sweet creaminess that cuts the spice just a bit and makes it balance.  Add some sweet corn & potatoes, and you are in for a bowl of magic. 

I am sometimes a little overwhelmed by heavy cream-based soups, so I really love that this recipe substitutes the traditional heavy cream in corn chowder for coconut milk and you really don't miss the dairy one bit.  The coconut milk creates a beautiful thick, sweet creamy texture when your puree it with the corn and potatoes that is just about identical to the traditional American recipe.  It's hearty and filling without being so overwhelming.  The fish sauce is added to pair with the curry take the sweet corn and coconut milk flavor down to a more savory and complexly layered flavor in the soup. 

Thai Curry Corn Chowder
Makes about 8 servings

6 cups vegetable stock
3 ears of corn (or 4 cups frozen or canned kernals)
1 large russet potato - peeled and diced
1 red pepper - diced
1 small onion - diced
1 can (14oz) coconut milk
1 tablespoon red or green curry paste
1 tablespoon fish sauce (optional - replace with 1 teaspoon hosin sauce or Braggs for a vegan soup)
cilantro & jalapeno to garnish

Cut the corn kernels of the cob (here's a tip to make that a cinch!). 
Add your stock to a large pot and bring it up to a simmer.
Meanwhile, in a saute pan, add butter and saute all your veggies for about 10 minutes until they brown up and get soft.
Add 1/2-3/4 of your vegetables, the coconut milk, fish sauce, and curry to the stock.  The fish sauce adds a savory element to the sweet corn and coconut milk, but you can omit that if you want a sweet soup.  Simmer for about 10 minutes.  Use a stick blender or food processor and blend your soup until you get nice smooth consistency. Add the remaining vegetables to add texture.  Cook for another 5 minutes.
Garnish with cilantro and/or jalapenos.

You can also add shrimp or shredded chicken if you'd like, but I found it just perfectly hearty without the meat.  It reheats really nicely, so it's a perfect make ahead meal or you can freeze individual portions.  Enjoy!

What are your favorite fall/winter comfort foods?

Arrested Development Party : Bluth's Cornballs with Spicy Remoulade Sauce!

26 May 2013


"New episodes of Arrested Development: the Super Bowl for nerds." - Heather Q

So true.

The waiting is over!  I've been looking forward to the new episodes for over a year!

Just for a bit of nerdy fun, my friend Heather invited me over to celebrate the new season debut with a party!  Some people celebrate the Super Bowl with parties and by making little football shaped cheese dips...I, on the other hand, celebrate TV shows with parties and by making corny (ha! get it?!) food references to the show - I'm ok with that!

I decided the perfect thing to bring was obviously some Cornballs - a Bluth family favorite!  In case you aren't familiar, here's a clip...


My party host was vegan, so of course I wanted to make this recipe vegan. The cornballs are based on the idea of a fried polenta and they are really versatile, so you can add some different flavors and spices to the mix or you could also try it with different sauces.  I think 1/2 cup or so of cheese would be an amazing addition - goat, cheddar, or queso would be lovely.

Cornballs with Roasted Jalapeños (vegan & gluten-free)
makes about 18 balls

2 cups water
1 can creamed corn
1-2 jalapeños
1 1/4 cups corn meal
1 tablespoon sugar
1 tablespoon butter (I used vegan Earth Balance)
1 teaspoon salt
1 teaspoon hot sauce
2 cups vegetable oil for frying


Start by roasting your jalapeños to give them a more mild flavor. Set your oven broiler to high and lay your jalapeno on a baking sheet. Broil for about 5-10 minutes until the skin is bubbling and blackened. You could also heat them on the grill or over a gas burner. Let them cool, remove the skin, mince, and set aside.
Heat oil to 375 degrees.
Combine water, creamed corn, jalapenos, sugar, butter, salt, & hot sauce in a saucepan. Bring to a boil. Whisk in corn meal and cook for 2-3 minutes. Remove from heat, allow to cool before rolling into 1" balls. 
Work in small batches (no more than 5 at a time) and fry for about 3-5 minutes until golden brown.  Drain on paper towels & serve immediately.


Quick Spicy Remoulade Sauce

1/2 cup mayonnaise (or vegenaise)
1 tablespoon sweet pickle relish
2 tablespoons ketchup
1/2-1 tablespoon Louisiana hot sauce
1/2 teaspoon prepared jarred horseradish
1 teaspoon dijon mustard
1 tablespoon sweet pickle relish

Give all your ingredients a mix and chill for at least an hour before serving.


Heather also set up a really cute DIY frozen banana making station for dessert with molten chocolate, nuts, and sprinkles for dessert!  It was perfect!


Are you watching? What do you think?  No spoilers! ;)


sweet and savory grilling! grilled asparagus and peaches.

26 May 2009

it's officially summer in portand. i don't care that the sostice is not until late june. the sun is shining, i have sunburn, and everything feels like summer, so it's summer! i've been busy trying to take care of things around the house before i get to caught up in the summertime. this much needed 3-day memorial day was spent going to yard sales and cleaning house mostly, but we also made a lovely dinner on our tiny grill.

here are two super simple grill recipes we used yesterday and they both turned out wonderfully. if you do not have a grill, these would be great in the oven as well. you would just want to cook them at about 400 degrees and check in on them every few minutes since they are both fast cookers.


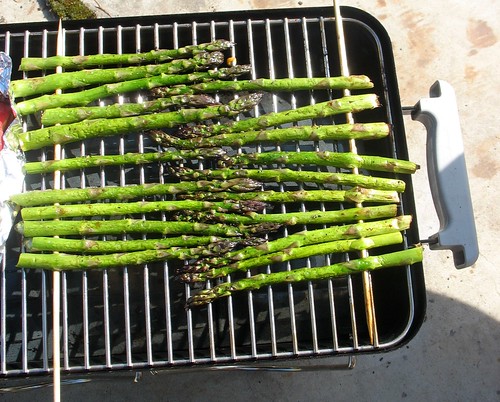
grilled asparagus
IMG_8066

1/2 bundle of asparagus
marinade:
1/4 cup olive oil
1/4 cup soy sauce
1 tablespoon black pepper
1 teaspoon rosemary
1/2 teaspoon liquid smoke (optional)


combine marinade ingredients in a jar and shake.
trim & wash your asparagus and the skewer through the thick part of the stem (you don't need to use a skewer, but it just makes it a lot easier to flip them and make sure they don't fall into the grill). i put about 10 spears per skewer and that seemed ideal.
lay asparagus skewers on aluminum foil (a little more than twice the length of the asparagus - about the length of a cookie sheet) pour half the marinade onto the first skewer. flip and make sure all the spears are coated. wrap the foil around the asparagus and refrigerate for about 30-60 minutes before grilling. grill each side for about 3-5 minutes until the asparagus gets tender.

and

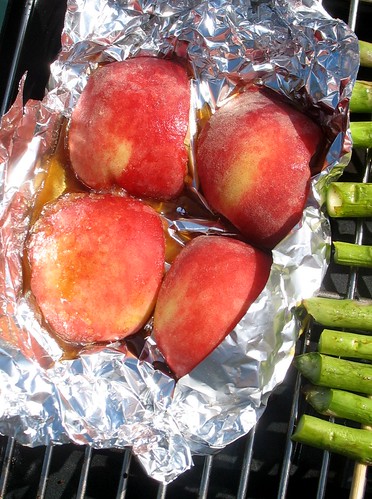
grilled vanilla peaches
IMG_8068

2-4 ripe peaches
1/2 cup brown sugar
1 teaspoon vanilla extract
1/4 teaspoon almond extract
1/4 teaspoon cinnamon
vanilla ice cream (optional)

wash and cut the peaches in half or quarters. remove the pits.
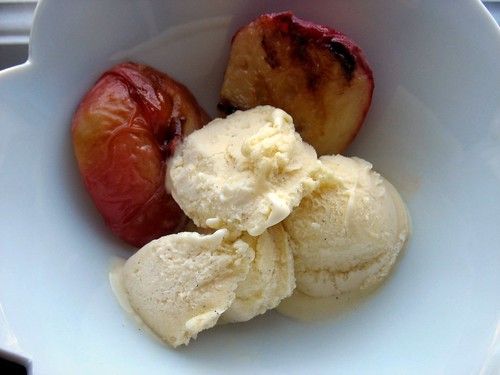
in a small bowl, mix sugar, cinnamon, almond extract, and vanilla. rub this mixture onto the peaches and coat on all sides. put the peaches on a piece of aluminum foil cut side down and curl up the sides a bit to avoid sugary syrup dripping all over your grill. put the foil and peaches on to the grill and allow to cook covered for about 3-4 minutes until the sugar melts and starts to caramelize. using tongs, remove the peaches from the foil and place directly on the grill for about 4-5 more minutes until desired tenderness. they turned out amazing! so easy, nothing too fancy involved, but they are just such a lovely treat for a cookout! you can eat these right off the grill, but i thought they were especially good with some ice cream on top!

IMG_8072

$5 meals: easy chickpea curry

02 May 2009

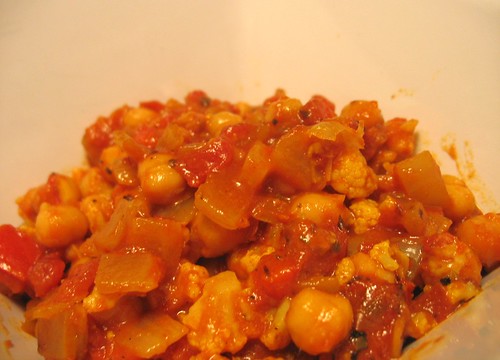
IMG_7831
easy chickpea curry

1 tablespoon vegetable oil - .10
2 cloves of garlic - .10
1/2 medium onion finely chopped - .50
1 15oz can chickpeas (garbanzo beans)- drained and rinsed - $1
2 diced ripe tomatoes or 1 15oz can diced tomatoes - $1
1/2 head of cauliflower - chopped - 1/2 @ $1.50 = .75
1 red or yellow pepper - diced - .50
1-2 tablespoons curry powder (i used yellow, but use any kind you like) - .50
1/2 cup water - negligible
salt and pepper to taste - negligible


total = $4.45 makes 4 servings ($1.11 per serving)

heat oil in a large pot and add onion and garlic and saute until translucent. this should take about 5 minutes.
add cauliflower, pepper, and curry and saute for another 2-3 minutes.
add water, chickpeas, and tomatoes. simmer for about 15 minutes

ok, i admit, this might be a more like a $6 meal because it is best served over some basmati rice. but it's still very cost effective at less than $2 per serving and it's really delicious and filling!

vegan peach cupcakes with mango frosting

24 April 2009

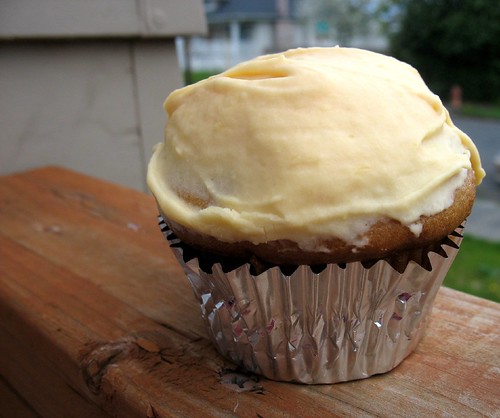
i purposefully used an almost identical recipe for the mango cupcakes for simplicity sake. you can easily whip up a double batch of unflavored batter and then seperate add the diffrent purees into the mix. i loved that these came out with a really strong, not too sweet mango taste.

IMG_7801


vegan peach cupcakes
1 tablespoon apple cider vinegar (don't worry about the smell, it bakes off)
1 cup of soymilk (flavored if you want...i used vanilla)
2 3/4 cups flour
2 teaspoons baking powder
1/2 teaspoon baking soda
1/2 teaspoon salt
1 cup sugar
1/2 cup oil
1 teaspoon vanilla extract
1/3 cup peach nectar
1/2 cup peach puree (i just used canned because it is not peach season)

preheat the oven to 350ºF.
put the cider vinegar into a small bowl and add the soymilk. whisk well. the mixture will start to thicken up or curdle (i know that sounds weird and gross and i was nervous, but trust me, this will work!)
stir together the flour, sugar, baking powder & soda and salt.
mix the oil, peach nectar, and vanilla extract into the bowl containing the soymilk and vinegar and then slowly add the wet ingredients to the dry ingredients and blend.
add peach puree and continue to blend.
scoop into cupcake wrappers. these will puff up a lot...more than most of the non-vegan cupcakes i make do. past vegan recipes i've made have ended up pretty flat, so as a caution i filled the wrappers almost to the top and got a really puffy dome top...so depending on what you are going for about 3/4 full is great.
bake for 20 - 25 minutes until starting to brown.


vegan mango frosting

1 cup (2 stick) vegan butter - room temperature
2-3 cups powdered sugar
puree of two fresh ripe mangos

bring cream cheese and butter to room temperature and beat together until creamy. add the mango puree.
add powdered sugar, 1 cup at a time, until desired sweetness and texture.
again, the puree will effect your ability to get a really stiff frosting, but i really think that nice strong mango flavor that came from using two mangos was worth a kind of goopey frosting.

my coworkers seemed to really love these as well as the strawberry ones. i think the key to this was using fresh mango, ripe in the frosting. you could try it with canned or frozen, but i cannot promise the same effect and delicious-ness.

vegan strawberry cupcakes and strawberry buttercream frosting

23 April 2009

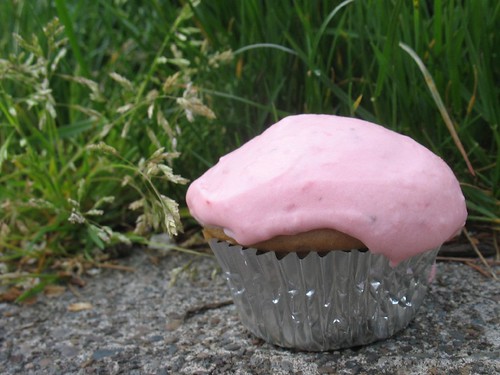
i really just wanted to go for the whole orange and pink work color scheme for the cupcakes i was making, so the logical choice to me for pink was strawberry since i have been dying to try my hand at strawberry buttercream. two of my coworkers are vegan. i am not a very good vegan baker, but i am working on it. it's important to me that if i am going to make something for work, hopefully it is something everyone will have the opportunity to enjoy. so, this is more adventures in vegan baking...

IMG_7795

the first step before you do anything else is to cop up a pint of strawberries (about 8oz) and add about 3/4 cup of sugar to them. let them sit in the fridge mixed into the sugar for at least 20 minutes (overnight is good too) so then can absorb the sugars and make a strawberry simple syrup. then mash them by hand or throw them into a blender. you will then use this puree for both the cake and the frosting.

vegan strawberry cupcakes
1 tablespoon apple cider vinegar (don't worry about the smell, it bakes off)
1 cup of soymilk (flavored if you want...i used vanilla)
2 3/4 cups flour
2 teaspoons baking powder
1/2 teaspoon baking soda
1/2 teaspoon salt
1 cup sugar
1/2 cup oil
1 teaspoon vanilla extract
1/3 cup strawberry nectar
1/2 cup mashed strawberries

preheat the oven to 350ºF.
put the cider vinegar into a small bowl and add the soymilk. whisk well. the mixture will start to thicken up or curdle (i know that sounds weird and gross and i was nervous, but trust me, this will work!)
stir together the flour, sugar, baking powder & soda and salt.
mix the oil, strawberry nectar, and vanilla extract into the bowl containing the soymilk and vinegar and then slowly add the wet ingredients to the dry ingredients and blend.
add strawberry puree and continue to blend.
scoop into cupcake wrappers. these will puff up a lot...more than most of the non-vegan cupcakes i make do. past vegan recipes i've made have ended up pretty flat, so as a caution i filled the wrappers almost to the top and got a really puffy dome top...so depending on what you are going for about 3/4 full is great.
bake for 20 - 25 minutes until starting to brown.


vegan strawberry frosting

1/2 cup (1 stick) vegan butter - room temperature
6 oz softened vegan cream cheese
2-3 cups powdered sugar

bring cream cheese and butter to room temperature and beat together until creamy. add 1/2 cup strawberry puree.
add powdered sugar, 1 cup at a time, until desired sweetness and texture.
you may want to add more puree to get a stronger flavor. i ended up using at least a cup i think, but it made for less firm frosting, so if you are concerned with having the frosting be able to be piped on, you may want to go easy on the puree. if you want to thin things out, just use some of the strawberry nectar. if you do not care to make this vegan, just use real butter and cream cheese...the effect is the same.


i was really happy with the results! i am not going to tell you that i think my vegan cupcakes are 100% as good as my cupcakes with egg and all the things i am used to using...there is definitely a different texture involved, but i think these were pretty darn good. i will absolutely make some version of the strawberry cupcake again in the next few months once it is officially strawberry season!

ooooh my darlin clementine..vegan cake!

18 March 2009

last week, i realized that my big wonderful bag of clementines (left over from the clementine cupcakes last week) were getting a little shriveled and i was just not going to be able to eat them fast enough to safe them. then i remembered that i saw a recipe on the vegan yumyum blog about candying clementines and a clementine cake, so i got to work!


step one was candying the clementines...
IMG_7366
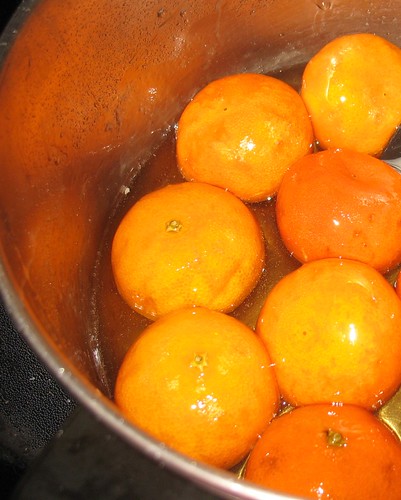
when you candy citrus, it makes the peel and rind completely edible. i had about 8 or 9 good clementines left, so i pierced them 8-10 times and added them to about 3 1/2 cups of sugar and 2 3/4 cup of water in a big pot and let them simmer for about an hour (according to lolo, you can simmer these for 1-2 hours, but the longer you simmer - the more bitter they will be).

IMG_7375

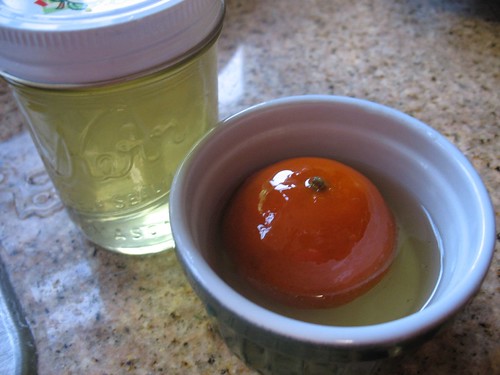
i was hoping to get a nice sweet candied clementine out of this process that i could maybe eat up with some cream fraise or something, but mine turned out quite bitter after an hour and i am not sure that i could deal with the idea of eating them just as they were. it might have been some mistake i made along the way, but after i drained the clementines out, i did end up with clementines with edible peel that were great to blend up for the cake and also some wonderful clementine flavored simple syrup for drinks and desserts in the future (make sure you save that part!).

IMG_7380

next, i started making the cake. i blended up the drained clementines with my emulsion blender to get about 1 1/2 cup of puree and added it to: 1/2 cup vegetable oil - 1 1/4 cup soymilk, or other non-dairy milk - 1/4 cup sugar - 2 cups all-purpose flour - 1 1/2 tsp baking powder - 2 tsp baking soda - 1/2 tsp salt. and i baked it for about 45 minutes on 350.

i also attempted the fondant on lolo's site, but i failed and it became more of glaze...which was less pretty, but very yummy. really, you just need to make sure you look at the vegan yum yum site because her photos are a million times more elegant than mine and she has a lot more detail on the process which is really helpful.

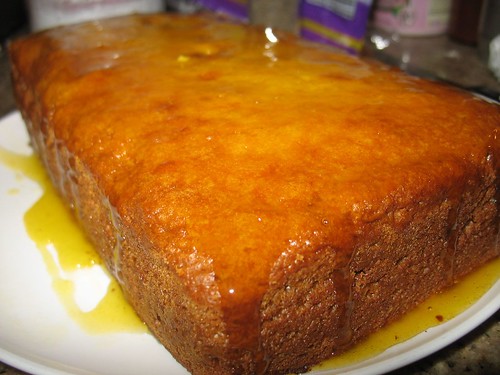
after all was said and done, there were some things that didn't work out just right, but it made a really good vegan cake with a nice balance of savory and sweetness. i brought the cake to work and my coworkers all were really into it and i got a ton of compliments, so i will call it a success.
 
Blogging tips