Showing posts with label garden. Show all posts

10 Plants Perfect for Containers!

13 May 2014


Spring is in the air and that means it is time for planting and planning gardens!  Spreadsheets are being made and seeds are being sown as I plan out this year's garden.  I'm lucky to have a garden plot in my yard, but I also really love doing container gardening on my deck.  I've actually found that I sometimes prefer container gardening because I love that it allows me to have a little more control of the plants I'm growing.  Also, since I live in a rental and live on a budget, I feel a little happier to make investments in things that I could bring with me if I move rather than working hard to make soil improvements on a plot I may not own in a few years.  Whatever the reason, container gardens are really fantastic because they are fun, productive, and great for any budget or space!

Today I'm sharing 10 of my favorite plants to grow in containers.  I think a lot of them might surprise you!  The possibilities with container gardens are huge!

Carrots
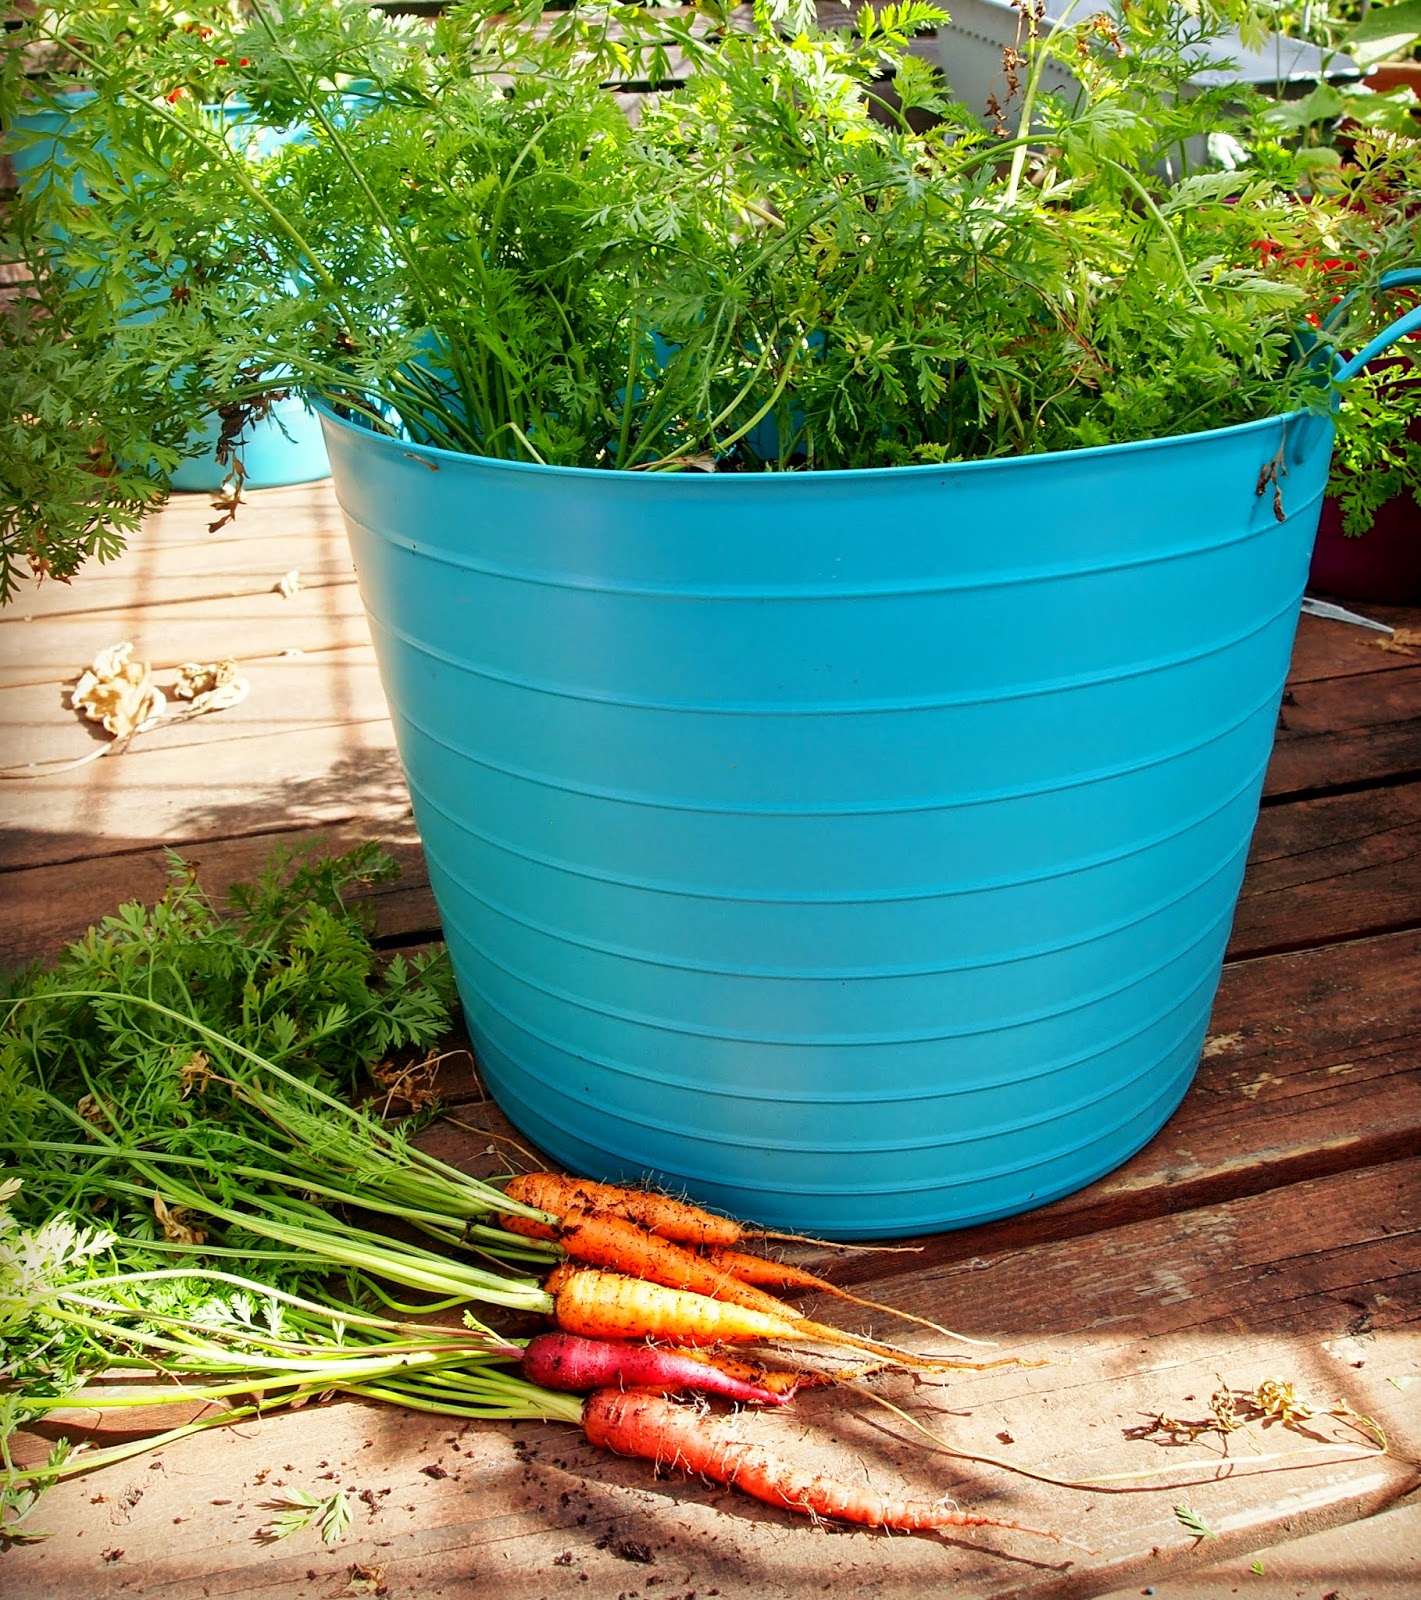
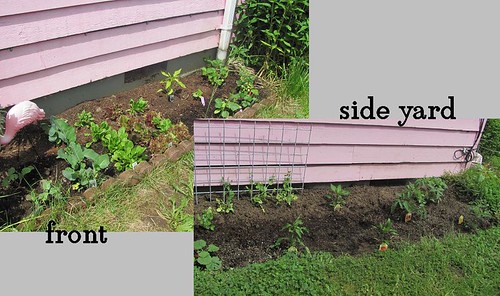
Pots are great for root vegetables like carrots because you have complete control of the soil, so you can be sure to keep the growing area soft with rock-free for perfectly straight carrots.  You can also keep the soil warmer by allowing more surface area to be warmed by the sun which will help your growth get a jump start. You need a deep pot, ideally with straight sides instead of tapered, at least 8" tall.  Varieties like Denver Half Long & Nantes are best with pots because they are a bit shorter.
Zucchini
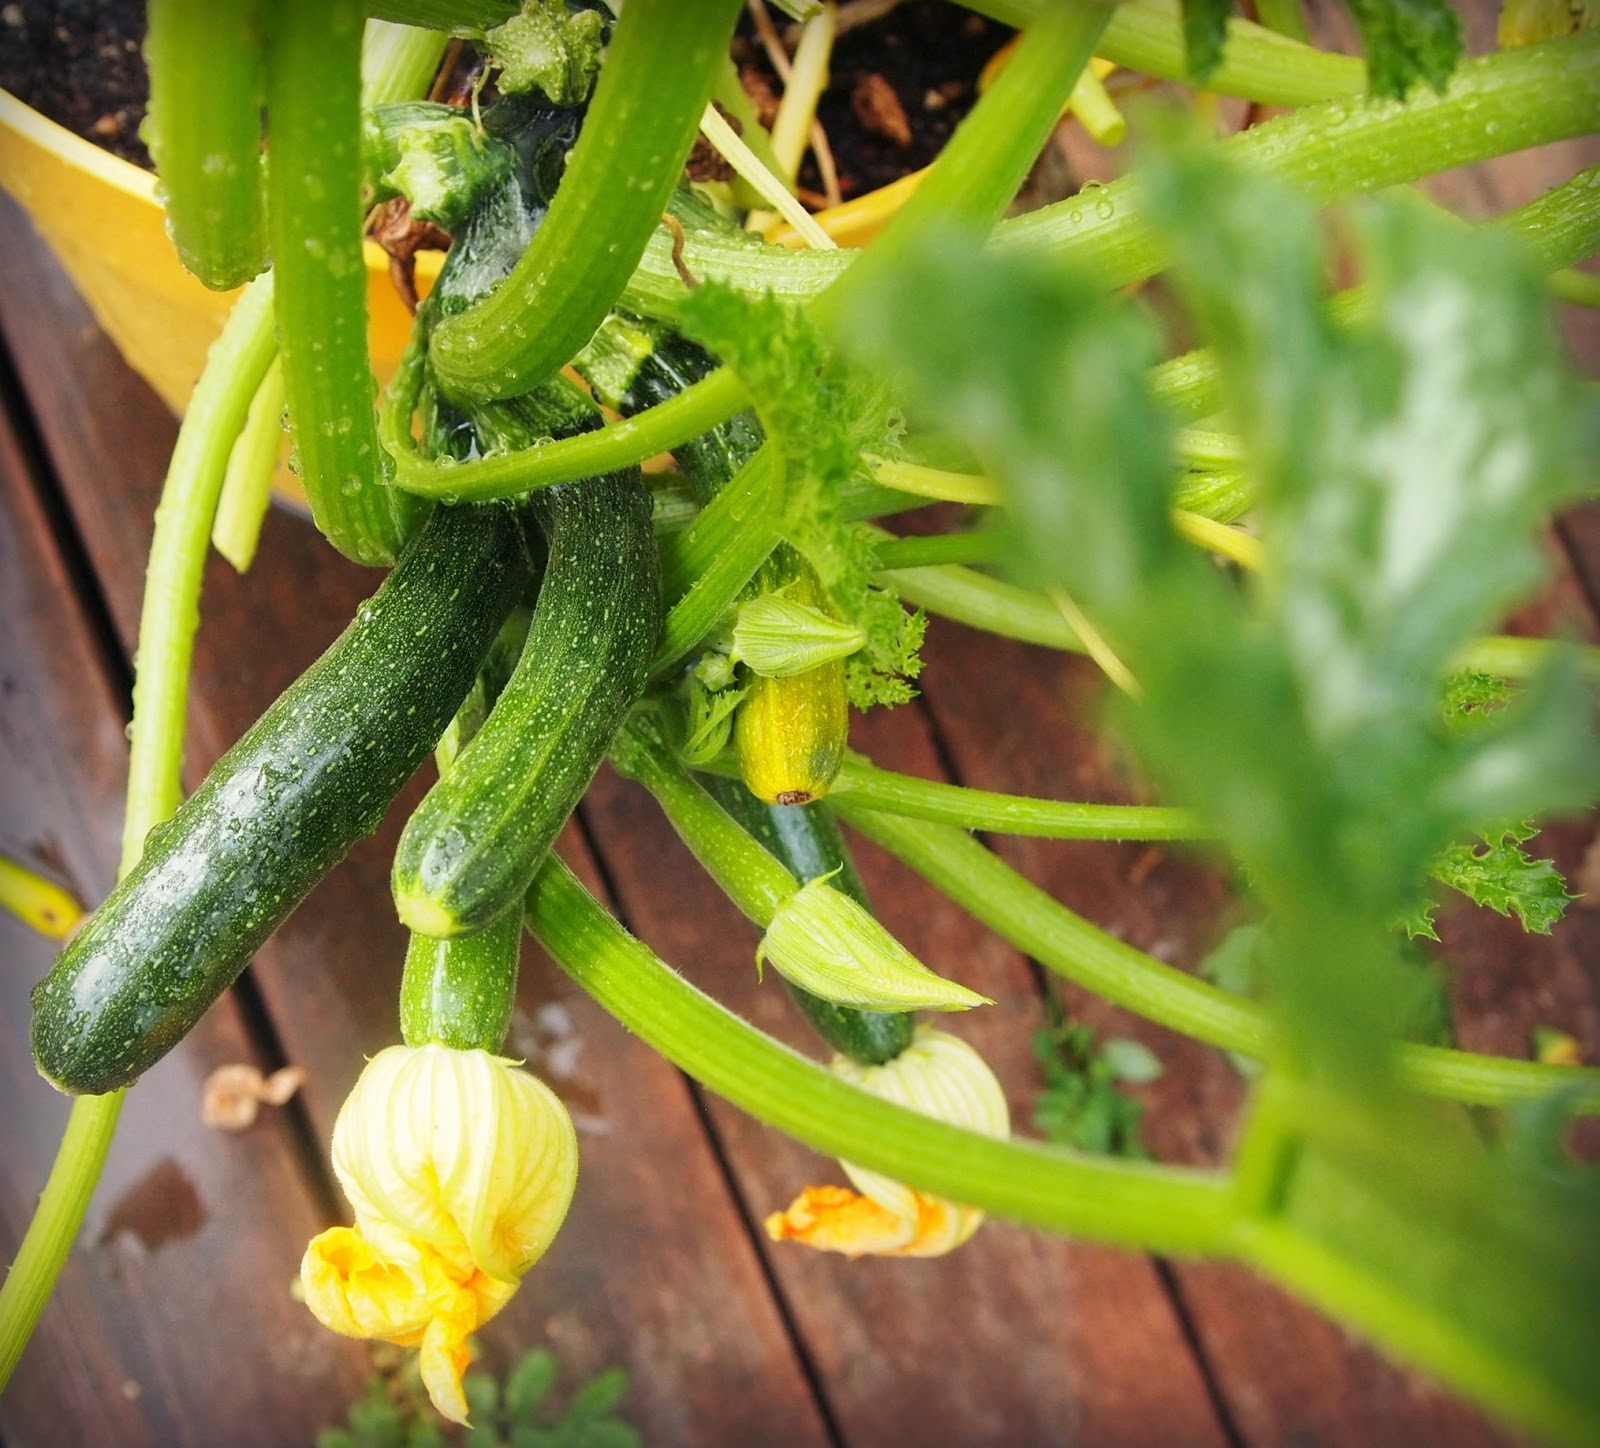
Zucchinis are well known as the gardener's friend because they are prolific producers, but what if you don't have the space or a yard to grow one?  Never fear, zucchini can actually be very happy in pots!  I was able to get an amazing harvest out of a potted zucchini last year and it outdid the one I had in the ground.  Use a 10+ gallon pot and remember that zucchini is prone to leaf mold, so whenever possible try to water them at the base and keep their leaves dry!

Melon
Although full-sized watermelons might not be the best choice for a container garden on your terrace, there are more compact varieties that thrive in containers. Small melons like sugar baby, golden midget, emerald gem, or moon and stars are ideal.  Plant them in a 5+ gallon container in full sun.

Peppers
I have had no luck getting peppers to grow in the mild Pacific NW summers because peppers love heat.  The pot helps the temperature of the roots stay a bit warmer with the extra sun exposure on the outside surface area.  Just about any variety will grown in containers 5+ gallons with full sun.

Eggplant
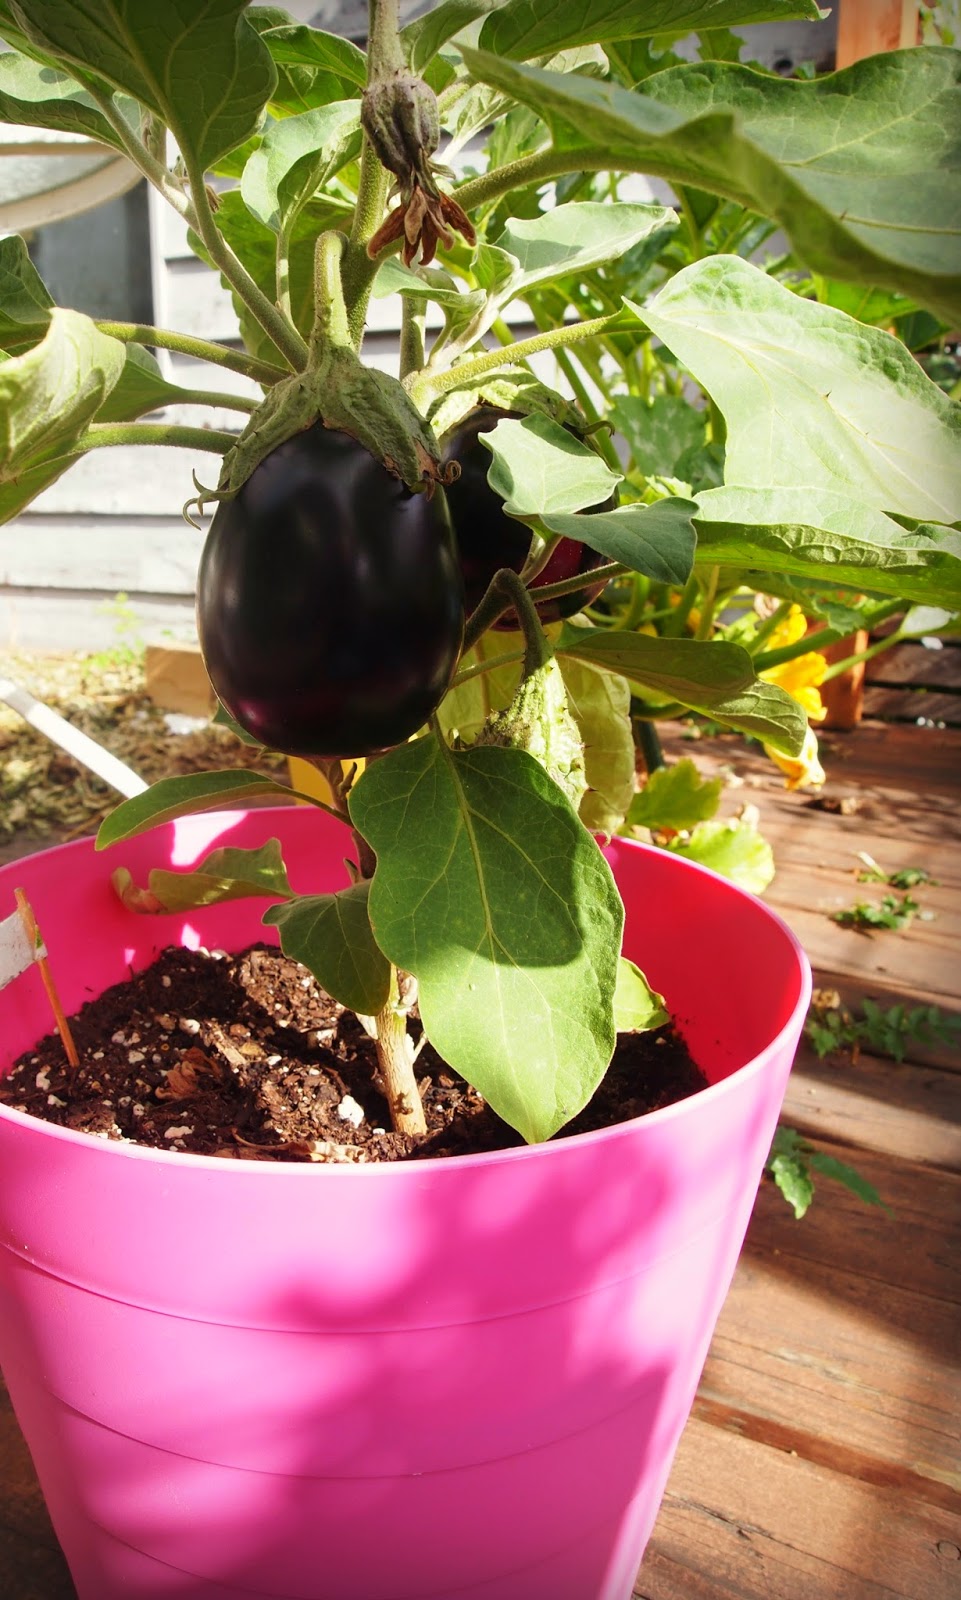
Eggplants are another heat loving plant that I've had better success with in pots than in beds.  I perfer the smaller, long chinese style - ichiban for high yields, but I've also had great success with the more traditional larger black beauty and white eggplant.  5+ gallon pot with full sun will do the trick and they may also require a support cage or pole as they start producing!
Radish
The great thing about radish are that they are both early planters and quickly ready to harvest, so you can plant a crop and harvest and then be ready to use your pot for another plant that gets sown later in the season.  This year, I am using my large tomato and zucchini 10 gallon pots for radish in the spring and I will be able to harvest them by May and plant my summer crops in the same soil after I give it a little nutrition boost.  You can use just about any smaller variety or radish like cherry belle or french breakfast . Larger varieties like diakon or watermelon radish can work in pots, but they require more spacing per plant and take longer to harvest.

Cucumbers
Cucumbers are probably my favorite thing to grow, they are perfect for pickles or summer salads - just the perfect summer flavor to me.  Cucumber will happily grow in 2.5+ gallon pots in full sun, but they do require a trellis to vine upwards.  You can also use longer rectangle containers and grown multiple plants up the same trellis.

Tomato
Tomatoes are happy to have the extra heat that comes with pot. Plant in 10+ gallon pots. Compact varieties like patio, stupice, or supersweet 100 are perfect for pots as they don't get quite as tall. You still will need a small cage or pole to help support the plant.  Happy tomatoes need full sun, lots of water, and regular feedings.

Potatoes
It might surprise you, but you can grow pounds upon pounds of potatoes without an ground garden plot!  Potatoes do best in at least a 10"+ deep container as they are root veggies and need all the space they can get.  The more space you give them, the more they will produce.  There are also a lot of great guides to inexpensively create potato towers with chicken wire and straw, but some of these type of containers do best over soil.

Peas
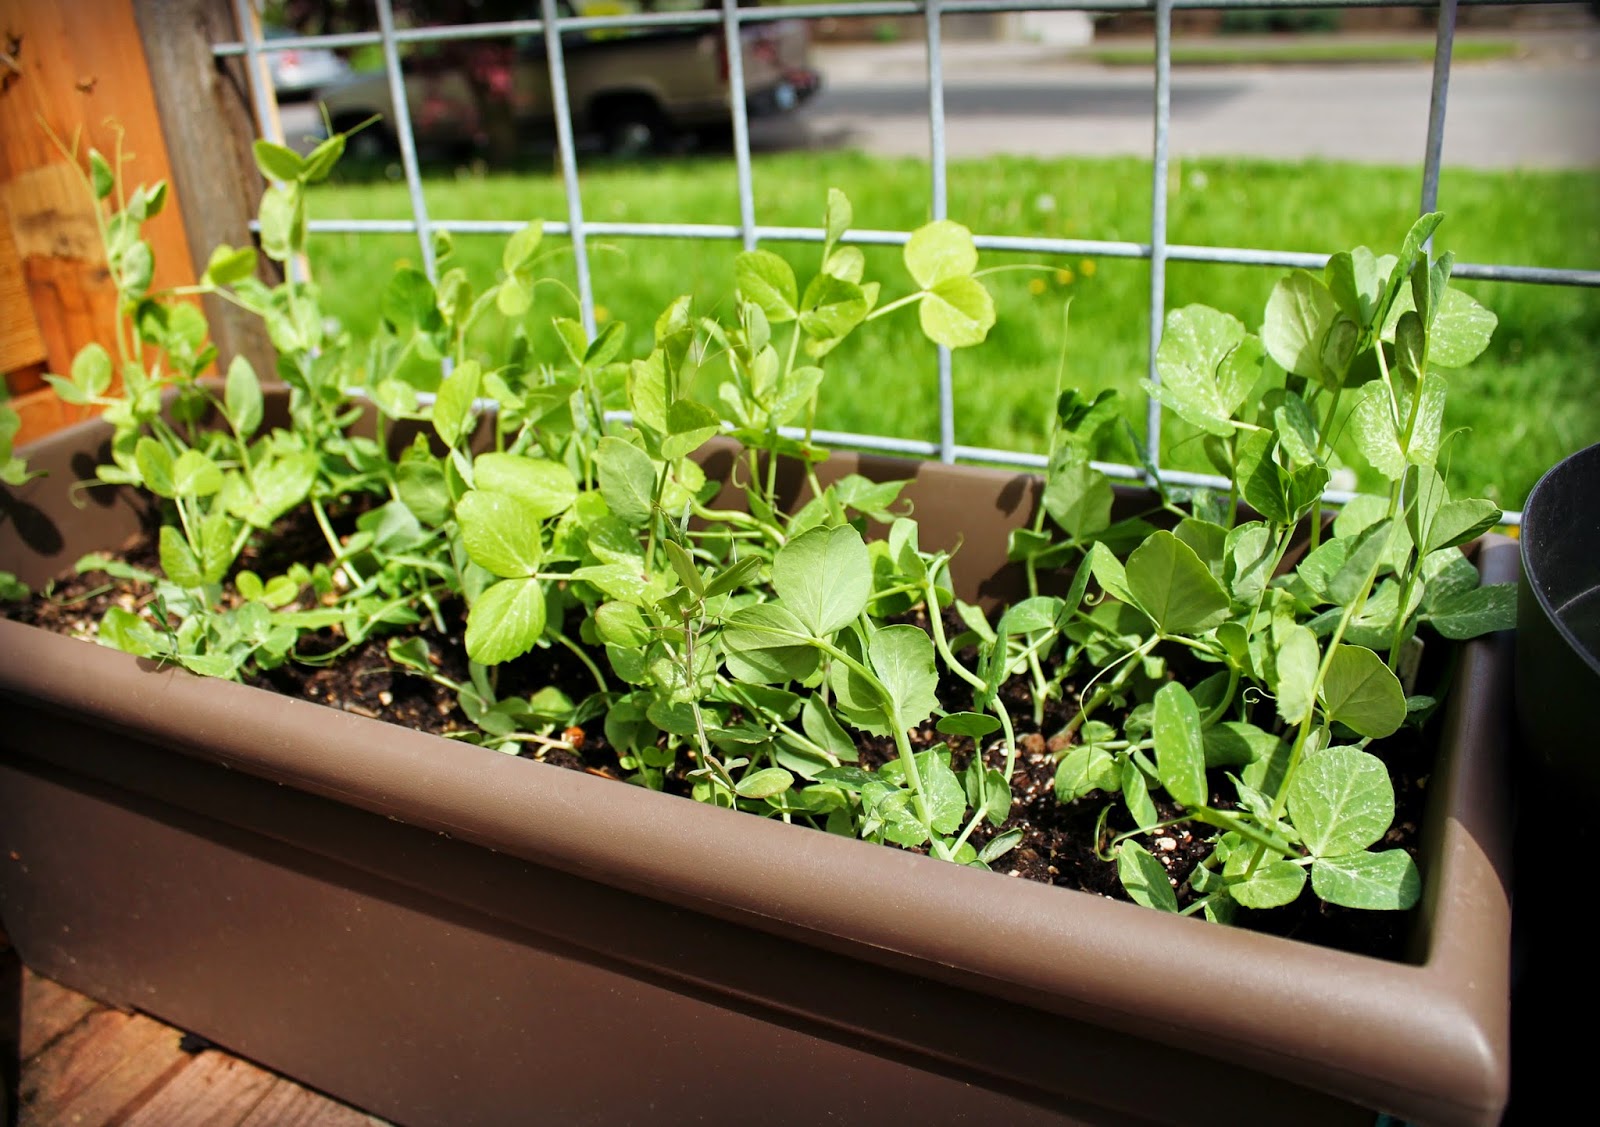
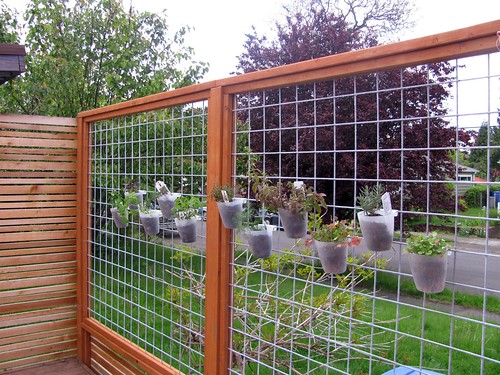
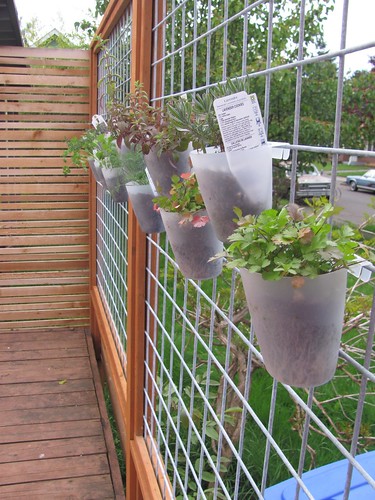
Peas are great for pots!  They require very little root space and grow vines vertically with pretty tight spacing between plants, so you are really able to grow quite a lot of plants in a small space.  Peas just need a trellis to grow upward.  If you have a balcony, you can simply weave string between the railing to give the vines something to hold onto. Just about any pea will grown in a pot, but smaller varieties like little marvel grow a bit more compact while still showing great yield.  Peas are easy to grow from seed and should probably be in the ground right about now (or a few weeks ago!), so get started!

What are your favorite plants to grow in containers?  What did I miss?

DIY Plant Markers Tutorial!

03 June 2013

I have been on the hunt for the perfect adorable plant markers that I could customize, but after scouring Pinterest for weeks, I came up short.  I decided to experiment a little with the left over oilcloth from the outdoor bunting I made last week and  came up with these darling little flags!  I absolutely love the pop of color they add to my mostly green veggie beds and they match perfectly with my colorful containers on the deck!  They are also pretty easy to put together and can be customized to your hearts content!


Oilcloth is the ideal medium for this because it is already waterproof, but you could also experiment with other materials like sandwiching pretty paper between the layers of vinyl and adding extra coats of outdoor modge podge to get a good seal.  Another option would just be to paint directly on the oilcloth with a nice heavy duty acrylic paint, but I can't paint to save my life, hence the printer is my BFF.

Here's what you need to get started :
1/8 yard thick clear vinyl*
patterned paper or oil cloth
a printer or letter stamps
outdoor mod podge
E6000 (or another strong waterproof glue)
6" skewers (or any other kind of dowel or even popsicle sticks)
binder clips
scissors
foam brush

*This is available at your local craft store - usually in large rolls. You can also buy it online. I used a 30 gauge because it was the thickest one available at my store.
1. Start by creating the text for your markers.  I printed a list of the things I was growing on basic white printer paper, but you could handwrite or use cute letter stamps.  Cut eat one into the shape you'd like.  I went with these cute little banner shapes by making a rectangle and then just cutting a little triangle off each end.  Each strip is about 1/2" tall.

2. Using your mod podge, glue down the paper to the oil cloth.  Make sure you have enough room (at least 1 1/2") on the left to wrap around the stick and then an extra 1/2"-1" on the right to cut you triangle for the flag. Also be sure to space them at least 1/2" or more so that you can cut the strips.  Add a layer on top to get a good seal.  Let this dry.

3. Cut your strips out of the oil cloth.  I left about 1/4" on the top and bottom, but you can leave as much room as you like.  You can also do this step with a paper cutter or a straight edge with a rotary cutter if you want to be precise, but I just did it free hand with the scissors and shaped as I went.
Overlay your clear vinyl and cut it into a strip that matches shape of the oil cloth.  Coat the vinyl in mod podge and lay it on top of your oil cloth.  Let it dry for about 30 minutes to an hour.  Don't worry about the white streaks, it will dry clear!  Once the mod podge is dry (it will no longer slip around on top of the oil cloth).  You can cut your triangle off the end.

4. Seal the edges with a coat of mod podge.  This will ensure that water can't get in between your oil cloth and vinyl to protect the paper inside.  Just use a foam brush and rub it along the edge. Since the mod podge dries clear, don't worry if it gets on the front vinyl, you can just coat the whole thing if you want.  Let dry.  Add one more coat around the edges.

5. The last step is attaching your sticks.  To do this, just turn it over add your E6000 to the flat edge.  Use the non-pointy end of your skewer to spread the glue and be sure the stick is nicely coated.  Wrap around the stick.  Once it's tightly wrapped and in place, use a binder clip to hold it in place.  Let dry.

Add to your plants and enjoy!


You can also experiment with different shapes!  This heart was made with the same process, I just used a large heart punch and added one more layer of the clear vinyl to the back side to make sure the stick was held tightly in place.  I love this shape because I can add notes like planting dates!


Happy gardening!

A Garden Giveaway!

28 May 2013

I have been so excited to garden lately & I really wanted to share that excitement with all of you!  I put together a little gardening prize pack that I think would be perfect introduction for the beginning gardener to start their own container garden or a great addition to any master gardener's toolbox!


Garden Giveaway at New Wave Domesticity!  Enter to win some neat garden tools!

I recently came across these adorable double-sided hanging planters called Splanties.  They are perfect for small spaces, patios, or even fire escapes.  It has a cute faux wicker look and and would be excellent to add some colorful flowers or start a little herb garden in your space.  You can win a pack of 3 to get your garden started or add to your existing space!


This awesome garden prize pack includes:

Pack of 3 XL double-sided Splanties Planters
Cute heavy-duty garden gloves
Bond Soil Moisture Meter (Easily see just how thirsty your plants are to ensure accurate watering every time!)
A pack of Jobes Organic Fertilizer Spikes 
A collection of 10 herb, veggie, & flower seeds

Enter below for your chance to win!

a Rafflecopter giveaway


Thank you all so very much for participating & for following along! Happy gardening!

My Colorful Patio!

21 May 2013

My deck is one of favorite places in my house.  We use it every chance we get in the summer!   From big BBQs to quiet morning coffee in the sunshine...I feel really lucky to have such a cute outdoor oasis.       I thought it might be fun to share it with you all!

Because I love the space so much, it was really important to be to make it feel really joyful with every design and color is my favorite way to do that.   I also have a super tight budget, so I found a lot of really simple and inexpensive ways to add some pops of color.  I chose some vibrant colored panters, a pair of turquoise adirondack chairs for lounging, and a really simple outdoor table with a fun bright tablecloth.

I've been working on some really cute & easy outdoor project tutorials (including that adorable pennant banner below!) - so stay tuned for those later this week!

For some reason, this old bike was tucked away up on the roof of our storage shed when we moved in, so we decided to embrace it and stand it up for a fun display.
A rainbow of container gardening!  Carrots, zucchini, peppers, cucumber, tomato, and peas.  Amazing bonus: our  metal lattice works as a perfect support trellis for peas and cucumbers to vine up!  

New pennant banner - tutorial tomorrow!
Vertical gardening using some great planters from Target & awesome Bygel containers from Ikea.
A bright lemon yellow tablecloth is the perfect place for some cold lemonade
Pretty turquoise chairs for lounging and hanging out with the pup.

Just beyond the deck, we have some gorgeous rose bushes...they don't call this place Rose City for nothin!

Getting the deck ready makes me really excited for the summertime!  Do you have an outdoor space that you love?  I'd love to hear about it!

A simple vertical garden!

20 June 2010

I recently moved into great cute little pink house and it is slowly, but surely starting to feel a lot like home. After living in several duplexes, it is really nice to have a real house with a yard and deck to ourselves. This is the first time I've felt like I really had the space to tackle making a real garden, so I am really excited about that! I've spent a lot of time learning, digging, and shopping for plants lately.

One of my favorite parts of my outdoor space is our vertical herb garden. It is a fantastic space saver and adds a fun element decoration to the patio. It was also really inexpensive to create!

IMG_0536

The side of our patio has a metal grate that I really wanted to be able to utilize in some way and dress up just a bit. I had bought some Bygel containers from Ikea to store pens in my craftroom, but I realized that they might actually be exactly what I needed for the patio! The Bygel containers fit perfectly onto the metal grates and they already have 3 holes drilled in the bottom, so they drain well and are perfect for plants! And for 99cents each, this project is super simple and fits any tiny budget! I imagine most people aren't lucky enough to have this grate system in their backyard, but these Ikea gems could be also be used with these rails (as they are in my craft room), fences, or maybe a nice heavy trellis of some kind? You could definitely set this vertical garden up indoors near a window, but just keep in mind that you would need a system to catch the water that drains from your plants.

IMG_0538

I have always been really unsuccessful with plants in the past (I always thought I had a "black thumb"), so I am extra delighted that all of my plants seem pretty happy and are growing well! We currently have about 10 types of herbs growing right outside our kitchen door and it has been so wonderful to be able to easily add some freshness into my dishes. I am looking forward to a summer full of trying some new herb recipes.

I also dug a few various small beds for planting veggies. I have about 30 various varieties of vegetables growing around the yard and so far they are mostly all doing quite well! My tomato, peppers, and squash have already started to flower and we are getting harvests of spinach and lettuce any time we need it. The strawberries are slowly, but surely turning from green to juicy red. I am really excited to be growing my own food...it's so empowering and I am surprising myself with how easily I am able to it! I am so excited for summer when my plants start to produce and I can try out some new recipes!

garden
(these photos were taken a couple of weeks ago, and there is already a lot of growth since then)
 
Blogging tips