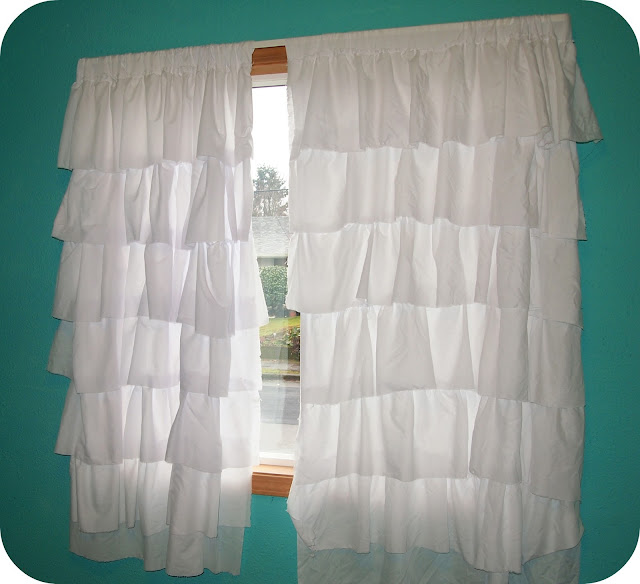
I have been seeing these amazing ruffled curtains around the internet and I knew I needed to have them in my craft room. This method may seem a bit complicated, but it is easier than you think! The ruffle is very forgiving since there is a lot of free-flowing textures, so if your lines are a little off or your ruffles are uneven, it will still look just how it should.
You will need:
7 yards of fabric - I used a lightweight cotton, but you could use anything that you like
white thread
a sewing machine
a ruler & rotary cutter (you could use scissors, but a quilters set will really make this MUCH easier for you!)
Make yourself a basic curtain. Just measure your fabric to the size of your window + about 4-5" inches and cut. Use that 4-5" to fold over and make a seem - this is where you will put the pole though.
Next, you need to make your ruffles! How many ruffles you would like to have is up to you -this part just requires a smidge of math on your part, here's how:
Total length of your curtain ÷ # of ruffles you'd like + 2" (for the overhang of each layer, you could do a little more if you'd like) = height of each fabric strip.
The width will be about twice as wide as your curtain.
I liked the shaggy look, so I did about 7 layers of 10", but you can customize it to your ascetic.
Now, let's start making the ruffles!
Using a loose long stitch, stitch along the length of top of the strip (about 1/2" down from the edge) - do not backstitch. Now, grab the end of the string at the end and give it a little pull (careful not to pull too hard and break the thread). This will start to give you a ruffle, just keep pulling and adjusting the fabric as you go (don't worry about making it even at this point, you can finess once you start to place it). I think it's ideal to just do all of your ruffles at the same time, so repeat the process through all your strips.
Once you have the ruffle ready, lay it down on your curtain and adjust it until the width is just right. Start your first ruffle right about where your seem for the curtain rod is. Pin the ruffle in place along the line and stitch it in place. Follow that same process of pinning and stitching for all the layers. Each of the layers should be set about 1"-2" above where the one above it ends. You could adjust this overhang to be more or less depending on what you like.
I really like the idea of the curtain looking a bit shabby chic, so I decided that I wanted to leave the bottom raw rather than hemming it. You could hem the bottom if you'd like a cleaner finish, just add about an inch to the height of each strip and fold over & sew.
You can also use this method to create other projects as well! I did the exact same process for the dessert table at our wedding - I just started with a premade fitted tablecloth and attached ruffles across the front panel. I absolutely love how special it turned out!
Now go on, ruffle everything!


